Learn how to identify delaminated plaster, address moisture or substrate issues, and decide when to stabilize, patch, replace, or call a pro.How to Restore Delaminated Plaster that is separated from its lath.
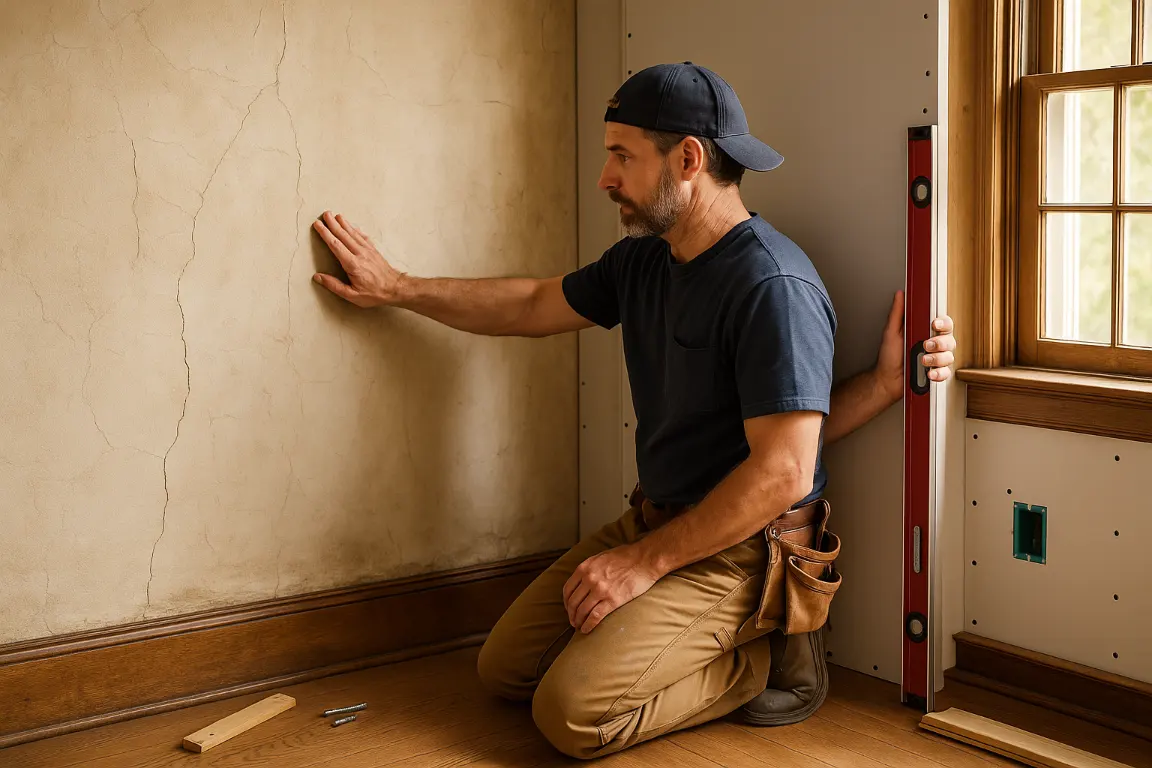
To restore delaminated plaster safely, start by finding out why it has pulled away from the wall or ceiling. A hollow sound, cracks, or slight movement can signal loose plaster, but the repair will only last if moisture problems and failed backing are addressed first.
With a careful diagnosis, homeowners can choose between reattaching sound sections, patching localized damage, or replacing plaster that has broken beyond repair.
Restore delaminated plaster safely by identifying loose, hollow, or moisture-damaged areas before patching. Fix leaks and moisture sources first, remove unstable material, and rebuild only on clean, dry, solid surfaces using compatible bonding agents and plaster. Feather, sand, prime, and paint for an invisible finish. Call a plaster specialist for sagging, widespread, recurring, or damp damage.
Before you restore delaminated plaster, establish why it failed. Loose plaster, cracks, paint failure, and a changing surface can point to plaster debonding, moisture, or movement within plaster walls. Proper diagnosis separates a lasting repair from a temporary cosmetic patch.
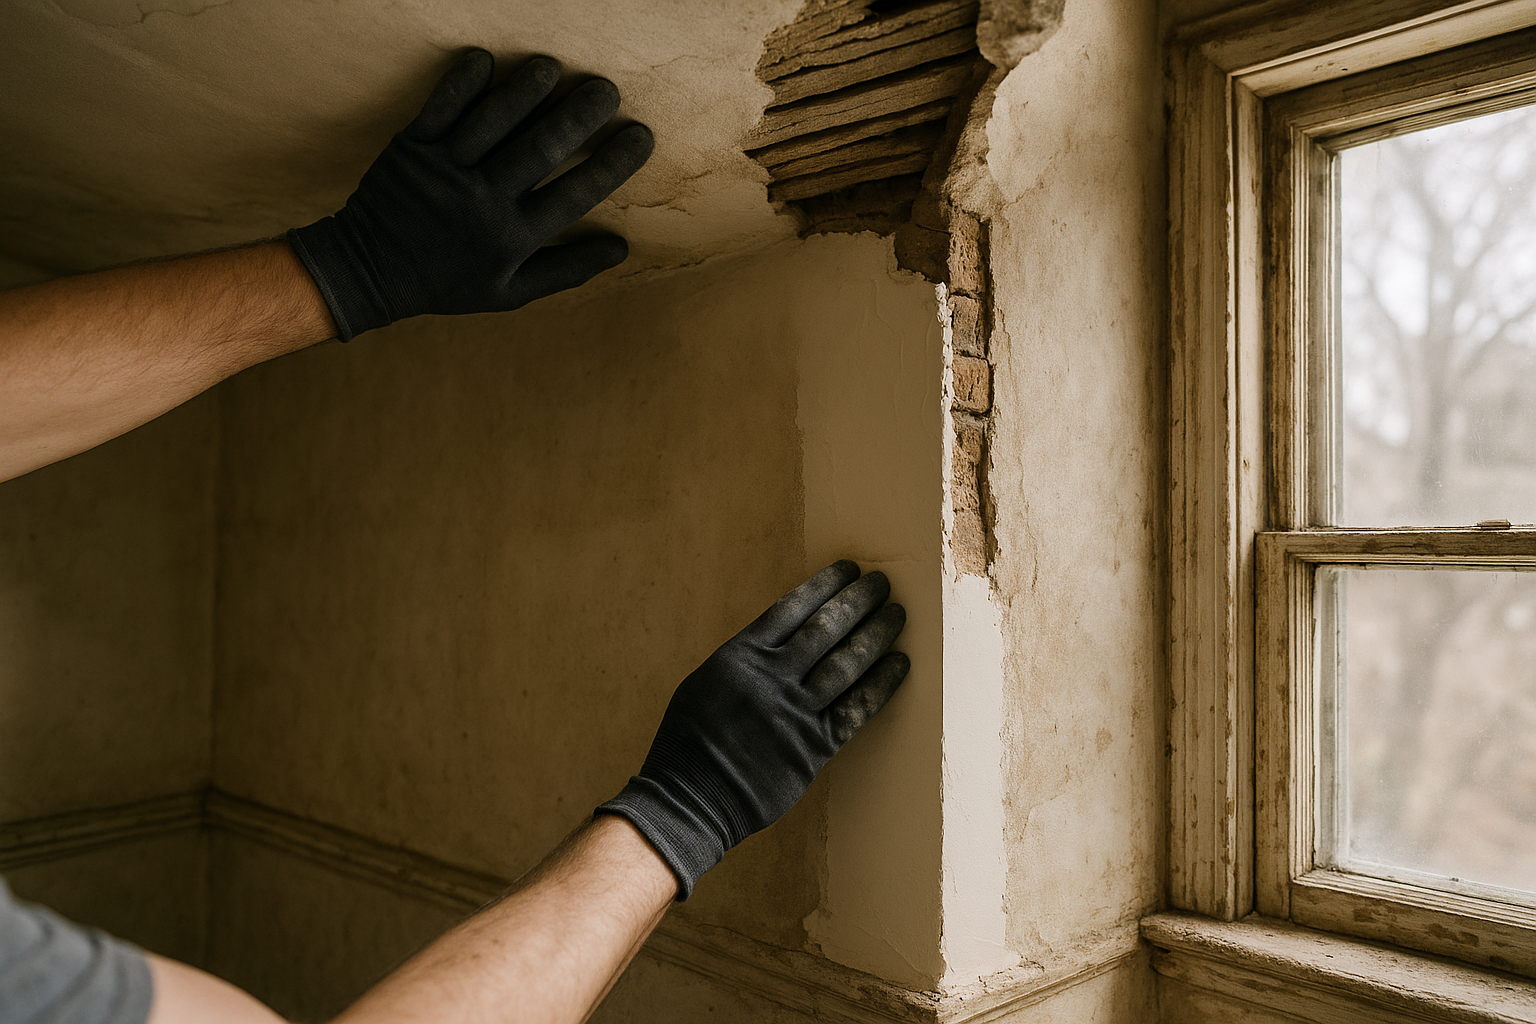
Delaminated plaster is not simply old or cracked plaster. It has released from the base beneath it, often wood lath, masonry, or an earlier plaster coat, creating a hollow, detached section. A light tap can reveal the difference: sound material feels firm and solid, while loose areas produce a noticeably hollow tone or flex slightly under gentle pressure.
Look closely at the pattern of the damage. Fine, stable hairline cracks may need a different approach than broad cracks with crumbling edges. Bubbling paint, staining, soft spots, or powdery material can indicate past or active moisture, which must be resolved before repair. Holes and missing sections also expose what sits behind the finish, helping determine whether the surrounding plaster remains secure.
At MrWalls Drywall & Painting, we assess the full affected area rather than repairing only the visible break. Damaged plaster can extend beyond obvious cracks, particularly around windows, ceilings, chimneys, and previously patched walls. Sound plaster may be retained and stabilized; blown plaster or severely weakened sections may require careful removal and rebuilding. That distinction protects the repair from separating again after it has been painted.
| What you notice | What it may indicate | Repair consideration |
|---|---|---|
| Fine, stable hairline cracks | Cracking without the stated signs of detachment | May require a different approach from broad or crumbling cracks. |
| Broad cracks with crumbling edges | More substantial plaster damage | Assess the full affected area, not only the visible crack. |
| Hollow sound when tapped or slight flexing under gentle pressure | Delaminated or loose plaster released from the base beneath it | Blown or severely weakened sections may require careful removal and rebuilding. |
| Bubbling paint, staining, soft spots, or powdery material | Past or active moisture | Resolve the moisture issue before repair. |
| Holes or missing sections | Exposed material behind the finish | Use the opening to determine whether surrounding plaster remains secure. |
Water-stained plaster is never just a cosmetic issue. Before repairing plaster, identify where the moisture came from and make sure the source has been fully corrected. A roof leak, failed flashing, overflowing gutter, plumbing pinhole, condensation around an exterior wall, or a bathroom ventilation problem can all leave similar marks while requiring very different repairs. Covering the evidence too soon may make the room look better briefly, but trapped or recurring moisture can compromise the work beneath the surface.
Look beyond the visible damage. Soft areas, blistering paint, brown staining, a musty smell, or powdery material at the wall surface may indicate moisture has travelled farther than expected. In older plaster, prolonged exposure can weaken the bond between the finish coat and its base, causing delamination. That hollow, loose condition often spreads beyond the original stain and should be addressed before any patching begins.
At MrWalls Drywall & Plaster, we assess the affected area with the whole house in mind: the wall or ceiling assembly, nearby fixtures, exterior drainage, and the condition of adjoining surfaces. The area must be dry, sound, and stable before repairs can hold properly. Once the water issue is resolved, damaged plaster can be removed back to firm material, rebuilt to match the surrounding texture, and prepared for a finish that belongs in your home, not one that masks an unresolved problem.
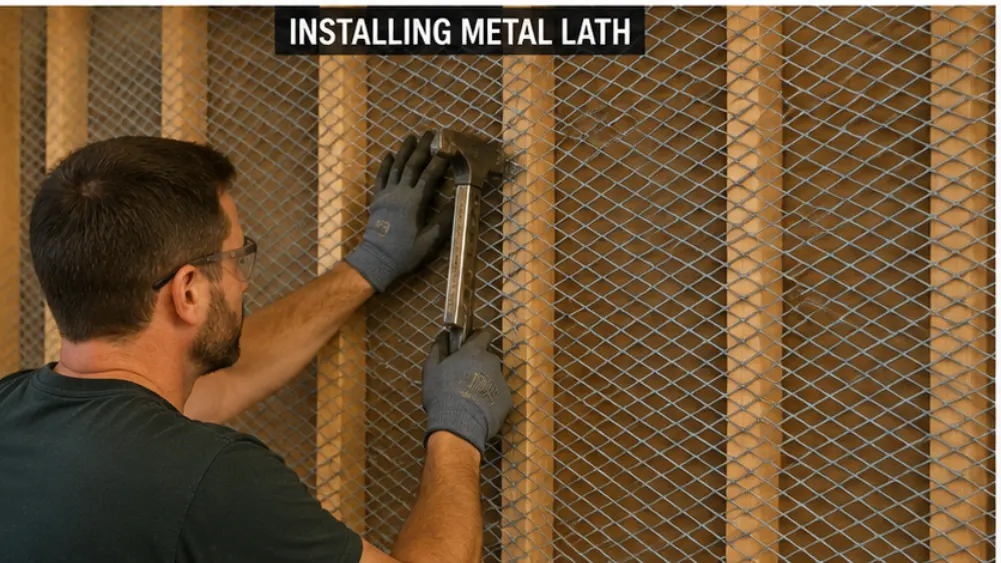
Not every patch calls for the same response. A hairline crack in otherwise sound walls may need only careful preparation and a finish repair, while loose plaster that moves when pressed signals a deeper failure behind the surface. The first step is to identify whether the plaster has separated from its lath, suffered water exposure, or simply taken an isolated impact. Small areas of damaged plaster can often be stabilized and resurfaced without disturbing the surrounding wall. When the material is crumbling, bulging, or no longer firmly attached, it is usually better to remove what has failed before rebuilding the area. Do not try to save material that is ready to break away; a clean, solid edge creates a far more durable repair. The age of the home also matters. Traditional plastering systems behave differently from modern drywall, and preserving original finishes may call for a more measured approach than a standard patch. With the right tools and supplies, some minor repairs are simple enough to manage with patience. For widespread plaster damage, recurring cracks, or suspected moisture issues, MrWalls Drywall & Plaster can assess the cause and recommend a repair that restores both the wall’s appearance and its long-term stability.
Once the damaged area is clean, dry and firmly edged, the repair can begin. The objective is not simply to fill the opening, but to create a patch that bonds securely to the existing surface and can be finished without a visible transition. At MrWalls Drywall & Painting we repair plaster and treat preparation as part of the repair: good tools, compatible supplies and measured application make a meaningful difference in how well new plaster holds over time.
Start by brushing away loose dust, then apply a bonding agent across the exposed base and slightly beyond the repair perimeter. This adhesive gives the new material a reliable grip, particularly on old, smooth or chalky plaster. Follow the manufacturer’s directions for drying time; some products receive plaster while tacky, while others must dry completely before coating.
Use a small container to mix only as much plaster as you can place before it begins to set. Add clean water first, then gradually work in the powder until it reaches a smooth, creamy consistency. Avoid overmixing, which can introduce air and shorten workable time. With a clean trowel or broad knife, press the wet plaster firmly into the patch rather than merely skimming it over the opening.
Build depth in thin, controlled coats where needed, allowing each layer to firm up before the next. Keep the final coat just proud of the surrounding wall, then feather its edges outward. This leaves enough material to sand or polish the repair flush after it cures, restoring a stable, even surface ready for primer and paint.
The final stages of repairing plaster determine whether the work disappears into the room or remains visible every time light moves across the walls. Once the repair has dried fully, refine the surface with a broad sanding block rather than concentrating pressure in one spot. The goal is not simply smoothness; it is a gentle transition from the patched area to the surrounding plaster, with no hard ridge at the edge.
Remove all sanding dust before you apply primer. A quality primer seals the repaired area evenly, preventing it from absorbing paint differently from the original wall. This step is particularly important with older plaster, where porous repairs can otherwise flash through as dull or uneven patches after painting. If the wall has a pronounced texture, recreate that texture before priming so the repair matches from every viewing angle.
For the most consistent result, paint from corner to corner or natural break to natural break instead of touching up only the repair. Fresh paint can differ subtly in sheen, even when the color match is exact, and a complete wall coat creates one continuous finish. At MrWalls Drywall & Plaster, we pay close attention to this last layer of preparation because it is what gives repaired walls their quiet, original character again.
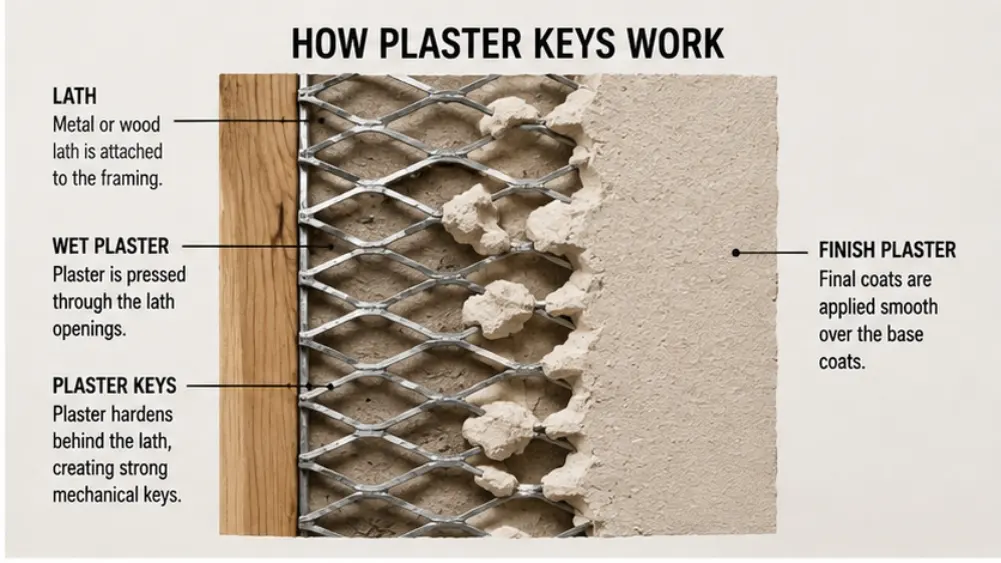
Once a repair is complete, the best protection against further plaster damage is managing moisture before it reaches the wall or ceiling. Keep roof flashing, gutters, plumbing connections, and bathroom ventilation in good order; even a small, recurring leak can introduce enough water to weaken the bond between plaster coats and the surface beneath. In older homes, seasonal movement and long-term humidity can also contribute to delaminated plaster, particularly around exterior walls, chimneys, and ceilings below bathrooms. Watch for hairline cracking that expands, hollow-sounding areas when gently tapped, staining, or loose plaster at corners and along ceiling lines. These are early warning signs, not cosmetic details to ignore. Avoid painting over a suspected moisture issue or pushing a bulge back into place, as both can conceal a worsening problem. A qualified plaster specialist should assess any area that is sagging, spreading, damp, or larger than a small isolated patch. They can identify whether the concern is limited to the finish coat, involves failed keys or lath, or points to an active water source elsewhere in the house. MrWalls Drywall & Plaster can evaluate the condition, stabilize the affected area, and recommend a repair approach that respects the character and construction of your home.
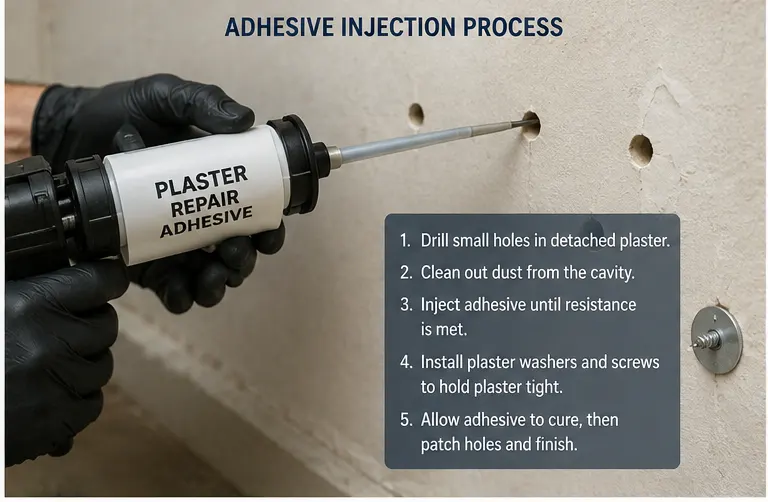
Delaminated plaster has separated from the lath, masonry, or base coat behind it. It may sound hollow when gently tapped, flex under light pressure, bulge, crack with crumbling edges, or show blistering paint. The loose area can extend beyond the visible crack or stain.
Small, stable areas may be stabilized and resurfaced if the surrounding plaster is firmly attached. Plaster that moves, crumbles, bulges, or has lost its bond should be removed back to solid material before rebuilding. Patching over failed plaster usually leads to another separation.
No. Find and correct the moisture source first, whether it is roofing, flashing, gutters, plumbing, condensation, or poor ventilation. The wall or ceiling must be dry and stable before repair. Painting or patching over ongoing moisture can hide a worsening problem.
Common causes include water exposure, failed plaster keys, movement in an older home, repeated humidity changes, impact damage, and deterioration of the original lath or base coat. Areas near windows, chimneys, exterior walls, bathrooms, and ceilings are often more vulnerable.
A bonding agent is often important when repairing old, smooth, dusty, or chalky plaster. It helps new plaster grip the prepared base and surrounding edges. Clean away loose dust first, then follow the bonding product instructions for the required drying or tack time.
A visible patch can result from uneven sanding, a hard edge, mismatched texture, or different paint absorption. Allow the repair to dry fully, feather it smoothly, remove dust, apply primer, and recreate any wall texture before painting. Painting the full wall often gives the most even sheen.
Contact a specialist for sagging ceilings, spreading cracks, recurring damage, damp or stained plaster, large hollow areas, or suspected lath and key failure. Professional assessment is especially useful in older homes where preserving original plaster and identifying hidden moisture require a careful approach.