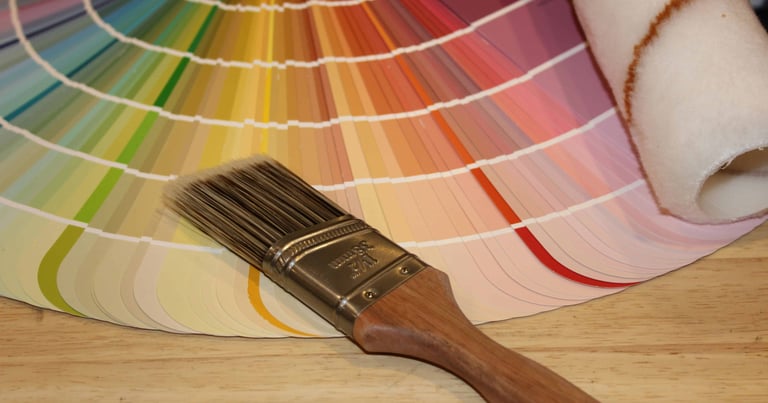
Introduction to Interior Painting for Homeowners in Westfield, Massachusetts
If you own a house in Westfield, Massachusetts, and you want to give your interior a new look, painting the walls, ceilings, and trim will make a big difference. Whether you're updating a tired room, prepping to sell, or just want that "just-painted" feeling, the right paint job boosts your home's value, brightens your space, and prolongs the life of your surfaces. In the next sections, you'll find expert guidance tailored for homeowners—everything from choosing colors that fit a Western Massachusetts home to the step-by-step process of painting ceilings, walls, and trim with confidence.
Why updating walls, ceilings, and trim matters in a Westfield home
Updating your interior surfaces matters on many levels: first, aesthetics. Fresh paint completely changes how a room feels: cleaner, brighter, more inviting. Most homes in Westfield have big windows that allow plenty of natural light in, so the choice of colours and finishes becomes more important. Second, maintenance and protection. Ceilings may show water stains or cracks, walls may have scuffs or faded spots, and wood trim may have aged varnish. A new coat of paint helps protect surfaces and extends their life. Third, value: if you ever plan to sell or refinance, well-painted interiors signal strong upkeep and attract buyers. Considering local climate too—with colder winters and seasonal humidity swings in Massachusetts—the paint you use and the prep you do matter for long-term durability.
Assessing the space before you pick up a brush
Before you buy paint or tape off trim, take a hard look at the rooms you'll paint. Watch for cracked plaster or drywall seams, peeling old paint, stains—caused by leaks or smoke, moisture spots on ceilings, and the condition of trim, which includes nicks, dents, and a poor paint job. Also, note the surface material: most older homes have plaster walls, but newer or renovated rooms usually have drywall. Trim may be pine, oak, or painted MDF. Knowing what substrate you're painting makes quite a difference in how you'll prepare and what products you'll use. And it is wise to check ceiling height plus lighting (particularly in period homes in Westfield, which might have higher-than-usual ceilings or ornate moldings). You will need to plan your tools—extension poles, scaffold—along with estimating how many gallons of paint you will need.
How to Choose the Right Colors for Your Interior in Westfield
Color plays two major roles: it sets the mood and it interacts with light. In Westfield homes, natural light might be softer or angled differently depending on the season. Neutral tones like warm greys, soft whites, or muted beiges work well as base colours—they reflect light and keep rooms feeling open. If you're doing accent walls, choose one wall in a deeper colour but keep ceilings and trim lighter to maintain contrast. When selecting colours for walls, ceilings, and trim together, aim for harmony—perhaps a one-shade-lighter trim than wall color so the molding stands out subtly. It's worth visiting a local paint store in Westfield and testing samples at different times of day to see how daylight (and the shade of your neighborhood) affects the color.
Selecting Paint Finishes for Walls, Ceilings, and Trim
The finish you select—flat, eggshell, satin, semi-gloss, high-gloss—affects both appearance and ease of cleaning. Ceilings are best done in a flat or matte finish to reduce glare and hide minor imperfections in the surface. For the walls, eggshell or satin works well because it provides some hardness but doesn't show as much shine. For the trim (baseboards, window/door casings), semi-gloss or gloss is usually preferred because it's easily wiped clean and resists wear. According to professionals, trim should have a sleek sheen for the best results. Selecting the proper finish also pays off when you try to match paint the next time around: make sure you use the same sheen for consistency.
Tools and Materials You’ll Need
Getting the right tools makes your job easier and the result better. You’ll want: quality angled brushes (2–3″ for trim/cut-in), 9-inch roller frames with appropriate nap covers (3/8″ for smooth drywall, thicker for textured surfaces), extension pole for ceilings and high walls, drop cloths (heavy-cotton recommended), good-quality painter’s tape, tray liners, spackling compound/wood filler for patching, sandpaper (fine-grit 220 or similar), and primer if needed. Don’t skimp on tape, brushes, or rollers—inexpensive tools often mean more coats and a longer time.
The Key to a Quality Paint Job: Step-by-Step Preparation
Preparation is where the professional results are won. Start by removing or moving furniture, taking down wall-hangings, removing outlet/switch plates, and covering floors/furniture with drop cloths. Clean surfaces: walls and trim may have dust, grease, or fingerprints. Use mild soap or a dedicated cleaner if needed. Sand rough spots or previous paint “nibs”. Patch holes or dings in walls or trim with spackling or wood filler; once dry, sand smooth. Tape off windows, doors, baseboards, and ceiling edges, or use a credible cut-in technique. This prep work ensures adhesion and reduces visible flaws after painting.
Painting the Ceiling: Start at the Top
It's best to start with the ceiling; that way, you avoid getting drips on newly painted walls or trim. Use a roller with an extension pole and work in sections that are manageable, such as 3–6 feet at a time, keeping a wet edge to create a uniform finish. Select a flat paint to reduce glare and hide minor imperfections. For homes in Westfield with tall ceilings or plaster surfaces, take note of lighting and shadows—only paint one quadrant at a time and step back periodically to check for streaks.
Painting Walls – Methods Ensuring Even Coverage
When going onto walls, do your "cut-in" first: with a brush, paint 2–3 inches around trim, corners, windows, ceilings. Then, with your roller, apply paint in a "W" or "M" shape, filling in, without lifting the roller. Keep your roller strokes consistent and maintain a "wet edge" (don't overlay dried paint) to avoid lap marks. If you're changing colour dramatically or working on a wall that has marks/blemishes, apply at least two coats. Let the first coat dry fully before the second, following the manufacturer's drying time.
Painting Trim and Baseboards: Detail Work
After walls and ceilings are done—or nearly done—focus on trim, doors, and baseboards. Use semi-gloss or gloss finish, as these hold up to traffic and cleaning. When painting trim, take it slow: hold the brush steady, stroke with the grain, and avoid heavy loads of paint that may drip. For crisp edges, some painters use a taping knife as a guide rather than tape for a straighter line. Allow the trim to dry thoroughly between coats. In Westfield homes that are older, wood trim may have nail holes, gaps, or old layers of varnish; prep by filling and sanding for the best finish.
Special Considerations for Homes in Westfield, Massachusetts
Living in Westfield may mean that your home was built in different eras—some older with plaster walls or historic moldings, others newer with drywall and standard woodwork. If your home has plaster, it will likely require special treatment, which could be just priming or a bonding primer. Seasonal humidity in Western Massachusetts—humid in the summer, cold in the winter—may be another factor that might make drying times longer and paint behavior differ. Plan indoor ventilation, and allow extra drying time if it is cooler or more humid. Local paint suppliers in and around Westfield will also carry brands geared toward regional conditions; stop in to ask about primers and paints rated for the Northeast climate.
DIY vs. Hiring a Professional Painter
While many homeowners can manage a single-room paint job, there are situations in which hiring a pro makes sense: large or high-ceiling rooms, intricate trim or historic surfaces, time constraints, or if you want a flawless, showroom finish. It's usually some sort of trade-off: cost vs. time/quality. If you have issues such as old, peeling paint, complex mouldings, or drywall repair, a professional can save you a lot of effort and make your paint job last longer.
Maintenance and Touch-Ups After the Job is Done
Once finished, let paint jobs cure; some will be dry to the touch but may take several weeks to finally set. Save some for touchups and label with color name, brand, and finish. Dust walls, and wipe trim with a mild detergent. Avoid harsh cleaners on newly painted surfaces. Chips and scuffs can be touched up when visible to make your work last.
Common Mistakes to Avoid
Poor adhesion or visible flaws due to skipping proper preparation, such as cleaning, sanding, and patching.
Painting over dirty or greasy surfaces—paint may peel or show uneven coverage.
Choosing the wrong roller nap for your surface, for example, using a thick nap on smooth drywall.
Rushing trim work or sloppy edges—it can detract from the overall appearance.
Not mixing paint cans before use can cause noticeable color differences.
Conclusion: A New Interior for Your Westfield Home
Refreshing your walls, ceilings, and trim is one of the most cost-effective home-improvement projects for Westfield, Massachusetts, homeowners. With the right preparation, colour choices, tools, and technique, you will get professional, time-lasting results. Whether you're doing it yourself or hiring help, the keys are proper preparation, correct finish selection, and attention to detail. Treat your home to the update it deserves—and enjoy the renewed sense of space and comfort that comes with it.
Frequently Asked Questions (FAQs)
Q1: How long should I wait before painting new drywall?
A: Let the compound cure after taping and mudding, then lightly sand and prime. Usually, a day or two will suffice, depending on the conditions. This helps in making sure the surface is ready and prevents any patch marks from showing through.
Q2: Can I paint over the existing trim colour, or do I need to remove it?
A: You can paint over the existing trim in most cases if the existing finish is intact, with no peeling or flaking. Clean and lightly sand, prime if necessary, then apply your chosen finish. If the old paint is failing, removal is safer.
Q3: What sheen should I use to paint interior ceilings in a Westfield home?
A: A flat or matte finish works best on ceilings: it hides any imperfections and keeps the focus on walls and trim. Anything higher in sheen calls attention to texture or flaws on the ceiling.
Q4: How many coats of paint do I typically need on interior walls?
A: Generally, two coats provide full, even coverage—especially if you're changing colors or going from a darker to lighter shade. Primer may reduce the number of coats needed.
Q5: When is painter’s tape really necessary? Can I “cut in” freehand?
A: Masking helps protect areas and can make the edges much cleaner, but many experienced painters use a steady hand and a quality angled brush to cut in without tape. It depends upon comfort level, precision needed, and how visible the edge will be.
Q6: My home has older plaster walls with cracks—what should I do before painting?
A: Fill the cracks with the appropriate filler for plaster or joint compound; sand it smooth when dry; clean the surface, and then apply a good primer. Using a primer ensures adhesion and will help reduce the likelihood of further cracking or paint failure.
