Learn how to fix shadow lines on your ceiling. Fix drywall ceiling humps step-by-step to restore smooth, level and flat walls and ceiling surfaces throughout your home with basic finishing tools. Ceiling lines every 4 ft at night?Lets Fix it.
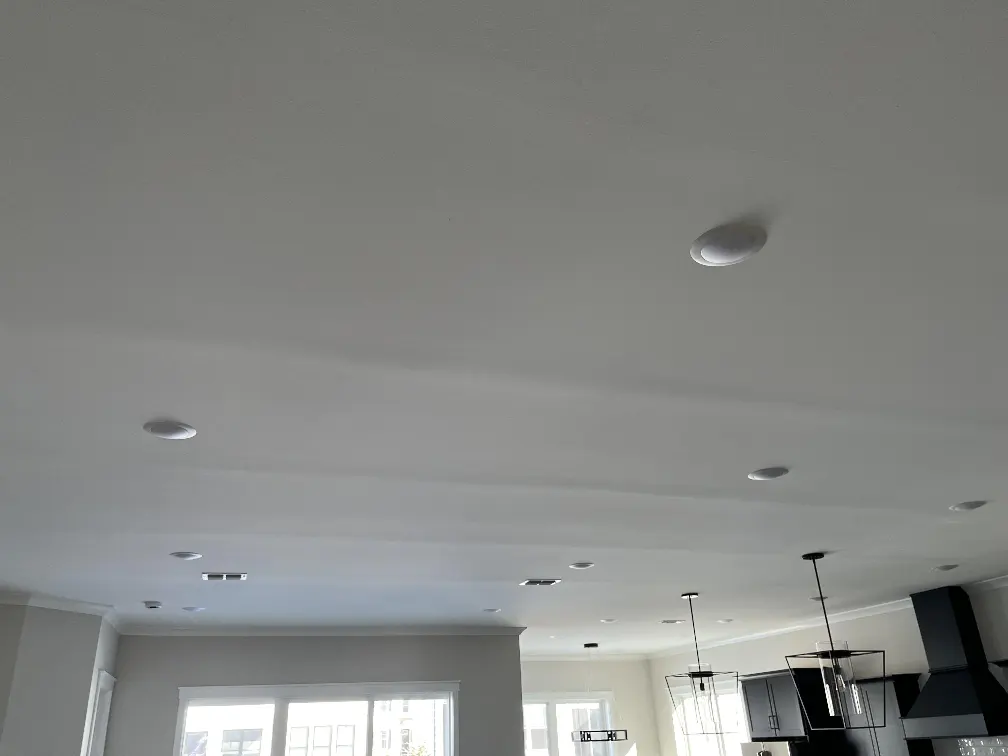
Do you have lines every 4 feet on your ceiling? Do they show up mostly at night? Don't worry its not a ghost you have humped drywall seams causing shadow lines because of the directional light in your home. My name is Jason Lebeau and I own and operate MrWalls Drywall & Painting in Chicopee Massachusetts. I have been a drywall repair contractor in New England for 25 years. This is how to get rid of those lines by repairing the problem. The drywall finisher that worked on your home left too much over the seams which causes that shadow line on the low light side of every drywall seam. Uneven drywall seams on a flat overhead plane with directional light, draw the eye immediately. When light sweeps across a ceiling in one direction only, any raised line, joint tape buildup, or structural bow casts a prominent shadow. Learning how to fix drywall ceiling humps restores a clean, continuous look to your living space without requiring you to tear out the drywall.
Whether you are dealing with poorly feathered joint compound over the seams, or heavy mud applications from a past repai, fixing these surface flaws requires an understanding of how drywall panel edges meet overhead.
Before grabbing a sanding block, it helps to identify why the bulge exists in the first place. Overhead joints act differently than wall joints. On the wall there is only one horisontal seam in the middle of the wall, but ceilings have one every four feet. If the lighting in the room is uneven or directional, any crown or hump in the mud will catch the light leaving a shadow on the low light side. Good drywall finishers know this and make sure their work is true and flat to avoid these problems. Finishers that are inexperienced or just don't care about quality are not as careful.
The drywall problems that can cause a hump and shadow line on the ceiling are:
Identifying exact surface variations on a high surface requires direct, low-angle light rather than standard overhead ambient lighting.
To find the trouble spots:
Drywall dust floats easily throughout the home if the work area is not correctly isolated. Protect your living spaces and furniture before starting any sanding or scraping work.
Clear out small furniture items, spread plastic sheeting across the floor, and seal off air vents to keep fine dust particles confined to the immediate project site.
If the ridge stems from alot of excess joint compound applied over the drywall tape, you can often fix drywall ceiling seam humps by removing the excess surface material directly.
Place your safety glasses and dust mask on. Take a scraper wood shaving tool and firmly scrape the peak of the hump to knock down the highest area.
Next, use a medium-grit sanding block to flatten the center of the hump where you scraped. You don't want to have to repair a hole in the drywall so be careful when scraping. Work in controlled, straight strokes along the direction of the joint. Avoid sanding through the paper layer of joint tape beneath. If the paper tape begins to fray or peel, stop sanding; you will need to feather out the sides around the high point using fresh compound rather than removing more height.
If you have a palm sander and shop vac that connects to it, use 40 grit paper and sand the high area down instead of scraping. Sanding leaves a smoother result requiring less repair work with compound to fix.
Check with a 24" straight edge to see if there is any remaining hump by looking for rocking. You can continue to sand until you reach the joint tape or get it flat. If you reach the joint tape layer and still have a hump, the best strategy is a visual illusion. You widen the base of the ridge on each side blending out with mud so the incline becomes imperceptible to the eye.
To blend out the edges effectively:
Once your feathering base coat dries completely, check the surface for hollow spots or low dips adjacent to the main ridge. Use the straight edge and be sure it doesn't rock when placed on the ceiling.
Apply a second, ultra-thin skim coat of lightweight joint compound across the full repair area. Hold your broad knife at a 45-degree angle, sweeping across the joint in smooth, continuous passes. The purpose of this layer is not to add bulk, but to fill tiny voids, pinholes, and subtle transition lines between the old surface and the new material.
If you hit small ridges left by the knife edge during application, do not attempt to wipe them while wet. Let them dry hard; they break off cleanly with a quick pass of a hand sander later.
With the compound dry, perform your final fine-sanding pass to achieve a smooth finish ready for primer.
Mount a fine-grit (180 to 220-grit) sanding screen or paper onto a pole sander or hand sander. Work in broad, sweeping circular motions over the repair zone, applying minimal pressure near the center peak and sweeping out past the feathered edges.
After sanding, wipe down the area with a damp microfiber cloth to remove residual dust. Re-run your flashlight flush along the ceiling surface. If the shadow has disappeared and the light glides across the area without breaking into hard lines, the repair is flat. If a shadow remains visible, repeat a light skim coat along the shadowed valley and re-sand once dry.
Bare joint compound and old painted drywall absorb paint at vastly different rates. Skipping primer causes "flashing", a blotchy finish where repair seams show through flat ceiling paint.
If the hump is minor and caused by low valleys on either side, you can blend the area out using only wide coats of compound and precise knife pressure, minimizing the need for heavy sanding. However, major peaks almost always require scraping down initial high spots first.
If the tape under the hump has lost its bond to the gypsum board, sanding or mudding over it will not solve the issue. You must cut out the loose section of paper tape with a utility knife. To patch the drywall tape, fill the gap with compound, lay a piece of new joint tape, wipe the tape. Then feather the edges smooth.
Drywall sheets have tapered edges along their long sides, creating a natural recess for tape and compound to sit below the surface plane. Short ends (butt joints) lack this recess, meaning any tape and compound applied over them rests entirely on top of the sheet plane. These areas require feathering out much wider, often 18 to 24 inches wide,to hide the build-up effectively.