
How We Successfully Paint a Popcorn Ceiling: Mistakes to avoid
Blog post description.
POPCORN TEXTUREPAINTING
Jason Lebeau MrWalls Drywall & Painting
3/7/20269 min read
How We Successfully Paint a Popcorn Ceiling: Mistakes to Avoid
Painting a popcorn ceiling can instantly transform your space, but beware—common pitfalls lurk. Discover how to achieve a flawless finish while avoiding costly mistakes.
Understanding Popcorn Ceilings: What They Are and Why They Matter
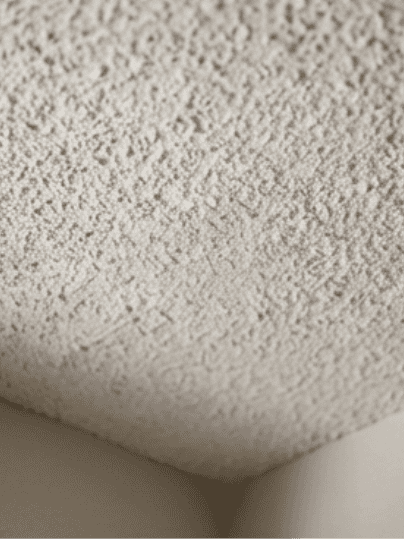
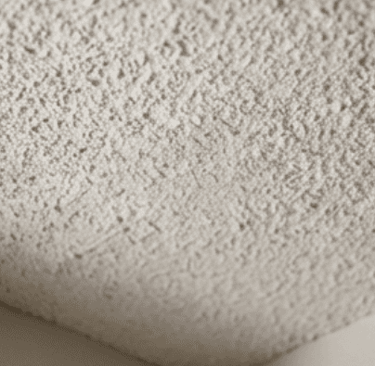
Popcorn ceilings, also known as acoustic ceilings, gained popularity in the mid-20th century, particularly from the 1950s to the 1980s. These ceilings are characterized by their bumpy, textured appearance, which was originally created by spraying or painting a mixture of Styrofoam, vermiculite, or other materials onto the ceiling. The primary appeal of popcorn ceilings was their ability to absorb sound and hide imperfections, making them a cost-effective solution for many homeowners and builders.
However, as design trends shifted towards cleaner, smoother finishes, popcorn ceilings fell out of favor. Despite their decline in popularity, many homes built during their heyday still feature these textured ceilings. If you're living in a house with a popcorn ceiling, you might be considering a refresh. Painting a popcorn ceiling can be a cost-effective way to modernize your space without the hassle and expense of removing the texture entirely.
Understanding the nature of popcorn ceilings is crucial before diving into a painting project. These ceilings can be delicate, and mishandling them can lead to damage or a less-than-perfect finish. Additionally, some older popcorn ceilings may contain asbestos, a hazardous material that requires professional removal. Knowing what you're dealing with will help you take the appropriate steps to ensure a safe and successful painting process.
Tools and Materials Needed for Painting a Popcorn Ceiling
Before you start painting your popcorn ceiling, it's essential to gather all the necessary tools and materials. Having everything on hand will make the process smoother and more efficient. The primary tools you'll need include a high-quality paint roller with a thick nap, a paintbrush for cutting in around the edges, and an extension pole to reach the ceiling comfortably. A paint sprayer can also be an effective tool for achieving an even coat on textured surfaces.
In addition to your painting tools, you'll need painter's tape, drop cloths or plastic sheeting, and a ladder or step stool to reach the ceiling safely. It's also a good idea to have a dust mask, safety goggles, and protective clothing to keep yourself safe from paint splatters and any potential debris. If your ceiling shows signs of damage or cracks, you may need spackle or joint compound to make necessary repairs before painting.
Choosing the right paint is also crucial for a successful project. Look for a high-quality ceiling paint that is specifically formulated for textured surfaces. These paints often have a thicker consistency and better coverage, ensuring that the texture remains intact while providing a smooth, even finish. Don't forget to pick up a paint primer if your ceiling has never been painted before or if you're making a significant color change.
Common Mistakes When Painting Popcorn Ceilings
One of the most common mistakes when painting a popcorn ceiling is using the wrong type of roller. A standard paint roller won't adequately cover the textured surface, leading to uneven coverage and missed spots. Instead, use a roller with a thick nap designed for textured surfaces. This type of roller can reach into the crevices of the popcorn texture, ensuring a more uniform finish.
Another frequent error is applying too much pressure while painting. Pressing too hard can flatten the texture or cause it to peel away from the ceiling. It's essential to use a light, even touch and let the paint roller do the work. Multiple light coats are often more effective and less damaging than a single heavy coat. This approach not only preserves the texture but also prevents drips and runs.
Failing to prepare the room properly is another mistake that can lead to a messy outcome. Popcorn ceilings tend to shed particles, and painting them can cause these particles to become airborne. To avoid this, make sure to cover all furniture, floors, and other surfaces with drop cloths or plastic sheeting. Additionally, use painter's tape to mask off walls, light fixtures, and other areas you don't want to paint. Proper preparation can save you a lot of time and frustration during the cleanup process.
Preparing Your Space: Essential Steps Before You Start
Preparation is the key to a successful popcorn ceiling painting project. Start by emptying the room as much as possible and covering any remaining furniture with drop cloths or plastic sheeting. Use painter's tape to protect the edges of the walls, light fixtures, ceiling fans, and any other areas you don't want to paint. This will help ensure clean lines and prevent paint from getting on surfaces where it doesn't belong.
Next, inspect your ceiling for any damage, such as cracks or holes. Use spackle or joint compound to make necessary repairs, and allow it to dry completely before sanding it smooth. If your ceiling has never been painted before, or if you're making a significant color change, it's a good idea to apply a coat of primer. Primer helps the paint adhere better and can improve the overall finish.
Before you start painting, it's essential to clean the ceiling thoroughly. Use a vacuum with a brush attachment or a broom to gently remove dust and cobwebs from the surface. If the ceiling is particularly dirty, you can use a damp cloth or sponge to wipe it down, but be sure to let it dry completely before painting. Taking these steps will help ensure that the paint adheres properly and that you achieve a smooth, even finish.
Techniques for Painting a Popcorn Ceiling Effectively
When it comes to painting a popcorn ceiling, technique is everything. Start by cutting in around the edges of the ceiling with a paintbrush. This involves painting a border around the perimeter of the ceiling, which will make it easier to use a roller for the rest of the surface. Be sure to use a brush with synthetic bristles, as they work best with latex paint.
Once you've cut in the edges, it's time to use a roller to paint the main surface of the ceiling. Use a roller with a thick nap designed for textured surfaces, and attach it to an extension pole to reach the ceiling comfortably. Apply the paint in light, even coats, using a gentle, rolling motion. Avoid pressing too hard, as this can flatten the texture or cause it to peel away from the ceiling. Multiple light coats are often more effective and less damaging than a single heavy coat.
If you're using a paint sprayer, be sure to follow the manufacturer's instructions carefully. Hold the sprayer about 12 to 18 inches from the ceiling and use smooth, sweeping motions to apply the paint. Work in small sections, overlapping each pass slightly to ensure even coverage. Be mindful of overspray, and use painter's tape and plastic sheeting to protect walls and other surfaces. With the right technique, you can achieve a beautiful, even finish on your popcorn ceiling.
Choosing the Right Paint for Your Popcorn Ceiling
Selecting the right paint is crucial for a successful popcorn ceiling painting project. Not all paints are created equal, and using the wrong type can lead to poor coverage, uneven finishes, and other issues. Look for a high-quality ceiling paint that is specifically formulated for textured surfaces. These paints often have a thicker consistency and better coverage, ensuring that the texture remains intact while providing a smooth, even finish.
When choosing a paint sheen, flat or matte finishes are generally the best options for popcorn ceilings. These finishes help to hide imperfections and create a more uniform appearance. Avoid glossy or semi-gloss finishes, as they can highlight the texture and any flaws in the ceiling. Additionally, flat and matte paints are less likely to reflect light, which can create a more calming and cohesive look in the room.
Consider the color of the paint as well. Lighter colors, such as white or off-white, are popular choices for ceilings because they can make a room feel more open and airy. However, you can also opt for a subtle tint to add a touch of warmth or interest to the space. If you're making a significant color change, be sure to apply a coat of primer first to ensure proper coverage and adhesion. With the right paint, you can achieve a beautiful, professional-looking finish on your popcorn ceiling.
Tips for Achieving a Smooth Finish on Textured Ceilings
Achieving a smooth finish on a textured ceiling can be challenging, but it's not impossible with the right approach. Start by using a high-quality paint roller with a thick nap designed for textured surfaces. This type of roller can reach into the crevices of the popcorn texture, ensuring a more uniform finish. Apply the paint in light, even coats, using a gentle, rolling motion. Multiple light coats are often more effective and less damaging than a single heavy coat.
Use a paint sprayer for an even smoother finish. A paint sprayer can distribute paint more evenly and reach into the crevices of the texture more effectively than a roller. Hold the sprayer about 12 to 18 inches from the ceiling and use smooth, sweeping motions to apply the paint. Work in small sections, overlapping each pass slightly to ensure even coverage. Be mindful of overspray, and use painter's tape and plastic sheeting to protect walls and other surfaces.
Another tip for achieving a smooth finish is to use a high-quality ceiling paint that is specifically formulated for textured surfaces. These paints often have a thicker consistency and better coverage, ensuring that the texture remains intact while providing a smooth, even finish. Choose a flat or matte finish to help hide imperfections and create a more uniform appearance. With the right tools, techniques, and paint, you can achieve a beautiful, professional-looking finish on your popcorn ceiling.
How to Handle Drips and Overspray: Best Practices
Drips and overspray are common issues when painting a popcorn ceiling, but they can be managed with the right techniques. Start by using a high-quality paint roller with a thick nap designed for textured surfaces. Apply the paint in light, even coats, using a gentle, rolling motion. Avoid pressing too hard, as this can cause the paint to drip or run. Multiple light coats are often more effective and less damaging than a single heavy coat.
If you're using a paint sprayer, be sure to follow the manufacturer's instructions carefully. Hold the sprayer about 12 to 18 inches from the ceiling and use smooth, sweeping motions to apply the paint. Work in small sections, overlapping each pass slightly to ensure even coverage. Be mindful of overspray, and use painter's tape and plastic sheeting to protect walls and other surfaces. If you do notice any drips or overspray, use a damp cloth or sponge to wipe them away immediately before they dry.
To prevent drips and overspray, it's also important to control the amount of paint you're using. Avoid overloading your roller or sprayer, and always start with a light coat. You can always add more paint if needed, but it's much harder to fix drips and runs once they've occurred. With careful application and attention to detail, you can achieve a beautiful, drip-free finish on your popcorn ceiling.
Post-Painting Care: Maintaining Your Newly Painted Ceiling
After successfully painting your popcorn ceiling, it's important to take steps to maintain its fresh, new appearance. One of the most crucial aspects of post-painting care is allowing the paint to cure properly. While the surface may feel dry to the touch within a few hours, it can take several days for the paint to fully cure. During this time, avoid touching or disturbing the ceiling to prevent smudges or damage.
Regular cleaning is also essential for maintaining your newly painted ceiling. Popcorn ceilings can attract dust and cobwebs, which can dull the paint over time. Use a vacuum with a brush attachment or a soft broom to gently remove dust and cobwebs from the surface. If the ceiling becomes dirty, use a damp cloth or sponge to wipe it down, but be sure to avoid excessive moisture, as this can damage the texture and paint.
Finally, be mindful of any potential damage to the ceiling. Avoid hanging heavy objects or installing fixtures that require drilling into the ceiling, as this can cause cracks or holes in the texture. If any damage does occur, make necessary repairs promptly to prevent further issues. With proper care and maintenance, your newly painted popcorn ceiling can remain beautiful and fresh for years to come.
Conclusion: Final Thoughts and Key Takeaways on Painting Popcorn Ceilings
Painting a popcorn ceiling can be a rewarding project that transforms the look and feel of your space. However, it requires careful preparation, the right tools and materials, and proper techniques to achieve a flawless finish. Understanding the nature of popcorn ceilings and the common mistakes to avoid can help you navigate the process more effectively.
Gather all the necessary tools and materials before you start, and take the time to prepare your space thoroughly. Use high-quality paint rollers or sprayers designed for textured surfaces, and apply the paint in light, even coats to avoid drips and runs. Choose the right paint for your ceiling, and consider using a flat or matte finish to create a more uniform appearance.
Maintaining your newly painted ceiling is also crucial for long-lasting results. Allow the paint to cure properly, clean the ceiling regularly, and be mindful of any potential damage. With these tips and best practices, you can achieve a beautiful, professional-looking finish on your popcorn ceiling and enjoy the refreshed look of your space for years to come.
Home | Services | Contact | Offices | Faq | Service Area | Blog | Appointment | Drywall Finishing | Drywall Taping | Drywall Repair | Plaster Repair | Ceiling Repair | Wall Repair | Drywall Installation | Drywall Hanging | Popcorn Ceiling Repair | Crack Repair | Hole in Ceiling | Hole In Wall | Interior Painting | Knockdown Texture | Water Damage Repair | Drywall Bathroom | Drywall Ceiling | Soundboard | Drywall Patch | Black Mold | Ice Dam Roof Leak | Drywall over Plaster | Wallpaper Removal | Fix a Hole | Skim Coating | Popcorn Removal | Apartment Turnovers | Massachusetts | Western MA | Springfield | Chicopee | Ludlow | Wilbraham | Longmeadow | East Longmeadow | Monson | Palmer | Belchertown | Granby | Amherst | Hadley | Northampton | Easthampton | Westhampton | Holyoke | South Hadley | West Springfield | Hampden | Agawam | Westfield | Southampton | Southwick | Granville | Hatfield | Lenox | Beckett | Lee | Great Barrington | Stockbridge | Huntington | Middlefield | Pelham | Plainfield | Ware | Williamsburg | Worthington | Brimfield | Blanford | Holland | Montgomery | Tolland | Wales | Refund Policy | Privacy Policy | Terms and Conditions


600 East Main St Chicopee, MA, 01020
203 Circuit Ave n39, West Springfield, MA 01089

