Learn how to assess drywall damage, choose the right patch method, finish repairs cleanly, and decide when professional help makes sense.
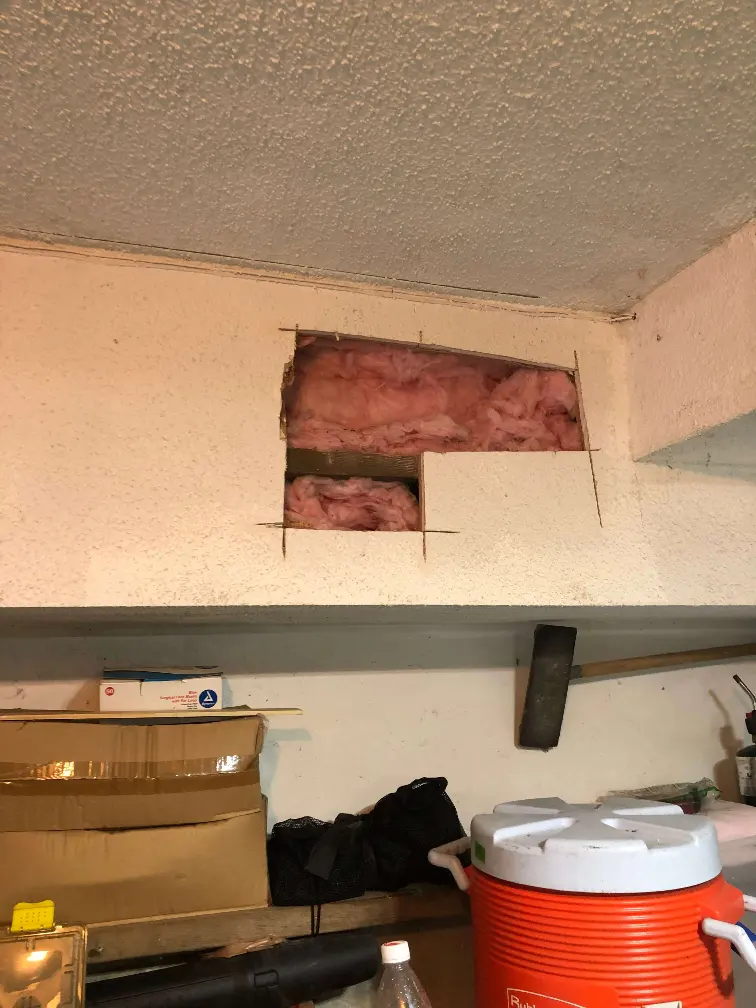
Patching drywall holes in walls can be a straightforward weekend repair or a sign that the wall needs more than spackle. Small nail pops and dents respond well to a simple patch, while larger holes, water damage, or recurring cracks may call for a more involved fix or a local drywall professional. Start by checking what caused the damage, then match the patch method to the hole’s size and location for a smooth, durable result.
Repair drywall holes successfully by checking first for wiring, plumbing, moisture, and potentially hazardous older materials. Match the repair method to the damage: compound for tiny holes, mesh patches for medium openings, and supported drywall inserts for larger gaps. Apply thin, feathered coats of joint compound, sand carefully under angled light, and prime before painting. Call a professional for leaks, loose drywall, recurring cracks, or suspected hazards.
Patching drywall holes in walls looks like a straightforward home DIY task, but the area behind a wall hole deserves a careful look first. Before cutting, sanding, or widening the hole for a repair, confirm that the drywall is dry, stable, and free of concealed hazards. A few minutes of preparation can prevent damage to wiring, plumbing, or the finished wall.
Start by inspecting the hole with a flashlight and, when possible, a small inspection mirror or phone camera. Note the direction of nearby studs: electrical cables and plumbing often run through or alongside framing, particularly near switches, outlets, bathrooms, kitchens, and laundry areas. Turn off power at the breaker before working close to electrical boxes, and never probe deeply into a wall with a knife, saw, or screw.
Look for staining, soft drywall, peeling paint, or a musty odor. These signs can point to an active leak or condensation issue that should be resolved before wall repair begins. Installing a patch over damp material may hide the symptom while allowing damage to spread behind the surface.
In an older building, be mindful of materials beneath the finish. Plaster walls may have wood lath rather than modern drywall backing, while some older joint compounds, textured finishes, paint, and insulation can contain hazardous materials. If the home predates modern renovation standards or the surface is unfamiliar, avoid creating dust. MrWalls Drywall & Painting recommends professional testing or assessment before sanding, cutting, or disturbing suspect paper-faced materials.
The right wall repair starts with an honest look at the damage. A pinhole from a picture frame, a dent from moving furniture, a popped fastener, and a doorknob-sized hole may all appear minor from across the room, but they call for different materials and techniques. Choosing a drywall patch that matches the size, depth, and location of the problem helps create a finish that stays smooth after paint, not one that sinks, cracks, or shows through in afternoon light.
For tiny nail holes and shallow dings, lightweight compound is often all that is needed. Small holes can usually take a self-adhesive drywall repair patch, followed by thin, feathered coats of compound. Larger openings need more support: a rigid backing piece, a fitted piece of drywall, tape, and joint compound. In high-traffic areas, a stronger repair patch can prevent the same spot from failing again after the next bump or scrape.
Repair patches and patch kits are convenient for straightforward jobs, especially when the wall surface is flat and the damage is isolated. A kit may include mesh, compound, a sanding tool, and an applicator, but it cannot correct loose drywall, moisture damage, recurring cracks, or a hole near an electrical box. Those conditions deserve a closer inspection before any patch goes on.
At MrWalls Drywall & Painting, we recommend selecting the simplest reliable fix rather than the fastest-looking one. The best patch disappears because the wall is properly supported, the edges are blended wide, and the repaired area is primed before painting.
| Damage type | Typical repair approach | Materials commonly needed | When to inspect further |
|---|---|---|---|
| Tiny nail holes and shallow dings | Fill and smooth with lightweight compound. | Lightweight compound | Inspect if the surface damage is deeper than it appears or does not smooth out with filling. |
| Small holes | Apply a self-adhesive repair patch, then use thin, feathered coats of compound. | Self-adhesive drywall repair patch, joint compound | Inspect if the damage is not isolated or the wall surface is not flat. |
| Larger openings | Build support behind the opening, fit a drywall piece, tape the seams, and finish with compound. | Rigid backing piece, fitted drywall piece, tape, joint compound | Inspect if the opening is near an electrical box. |
| Damage in high-traffic areas | Use a stronger repair patch to help the repaired spot withstand future bumps and scrapes. | Stronger repair patch, compound | Inspect if the same area repeatedly fails after impact. |
| Loose drywall, moisture damage, or recurring cracks | Do not rely on a simple patch; inspect the underlying condition before repairing. | Materials depend on the cause found during inspection | Inspect before applying any patch. |
A smooth drywall repair starts with a modest, well-chosen kit. At MrWalls Drywall & Painting, we find that homeowners get better results by using fewer tools correctly rather than improvising with whatever is in the garage. Begin with a flexible putty knife, typically a narrow blade for filling small holes and a wider knife for feathering the repair into the surrounding wall. Keep both blades clean; dried compound along an edge can leave ridges that show through paint.
For most indoor repairs, use premixed joint compound, often called mud. It spreads easily, sands predictably, and gives you time to refine the surface. A lightweight compound is convenient for shallow dents and nail pops, while setting-type compound is useful when a deeper fill needs to harden sooner. Apply thin coats instead of trying to build the repair in one pass.
Mesh tape reinforces seams, cracks, and patched openings before the compound goes on. Its woven fiber backing helps bridge minor movement and is especially practical for small drywall patch projects. Paper tape remains a good choice for long, flat seams, but mesh tape is often simpler for isolated repairs because it adheres directly to the wall.
Round out the kit with a sanding sponge or fine-grit paper, a dust brush, a utility knife, a clean mixing tray, and primer matched to the repaired area. Good lighting matters, too: a work light held across the wall will reveal high spots and shallow depressions before paint makes them permanent.
Small wall holes are among the simplest drywall repair jobs, but a clean result depends on restraint as much as technique. Whether the mark came from a picture-hanging nail, a screw, or a removed plastic anchor, begin by brushing away loose paper and dust. If an anchor is still seated in the wall, back it out with a screw or carefully pull it free; forcing it inward can leave a larger damaged area to repair.
Use a flexible putty knife to press a small amount of joint compound into the hole, working from more than one direction so the material fills the cavity rather than merely covering its surface. Keep the first coat thin and feather its edges beyond the hole. A thick mound may seem efficient, but it takes longer to dry and usually requires more sanding.
Once dry, lightly sand the area with fine-grit paper until it feels level with the surrounding wall. Hold a work light at an angle across the surface to reveal any shallow depression or raised edge. Apply a second, wider coat only where needed, then sand again after it cures. For most nail holes, one careful pass is enough; larger screw and anchor holes may need two.
Finish by wiping away sanding dust and applying matching primer before touch-up paint. This final step helps the repaired spot accept paint evenly, particularly on walls with a flat or matte finish. At MrWalls Drywall & Painting, we find that patient, light applications produce the kind of invisible repair that keeps an otherwise well-finished room looking intact.
A medium wall hole, roughly 4 to 6 inches across, needs more support than a simple dab of filler can provide. For a clean, durable result, MrWalls Drywall & Painting recommends a drywall repair patch sized to overlap the damaged area by at least an inch on every side.
Thin layers dry more evenly and are easier to sand than one heavy application. Once the final compound coat is smooth and level with the wall, prime the repaired area before painting. Primer helps the patch absorb paint consistently, preventing a dull or flashing spot in the finished sheen.
A large drywall patch needs more than compound across a gap. To create a repair that stays flat and resists future cracks, the new drywall must be supported on solid wood backing or, ideally, fastened directly to existing studs. Start by cutting the damaged area into a clean square or rectangle, extending the opening until the edges are sound and there is a practical framing surface to work with. Measure the opening carefully, then cut a matching patch from drywall of the same thickness.
Where studs are not available at every edge, slide wood backing strips behind the existing drywall. Hold each strip tight to the backside of the opening and drive drywall screws through the face of the wall to secure it. Leave enough backing exposed for the patch to rest on, then screw the patch into the wood or studs without breaking the paper face. The surface should sit flush; adjust before finishing, because compound cannot disguise a proud or recessed patch gracefully.
Cover each seam with paper tape or self-adhesive mesh tape. Mesh tape is convenient for stable, well-supported repairs, while paper tape remains a strong choice for seams that may see slight movement. Apply joint compound in thin, broad coats, widening each pass beyond the last so the repair blends into the surrounding wall. Let every coat dry fully, sand lightly, and inspect under raking light before priming. MrWalls Drywall & Painting recommends a final skim coat whenever the patched area falls on a prominent wall, where even a small ridge can show after paint.
A seamless drywall repair is built in thin layers, not hidden under one heavy application. At MrWalls Drywall & Painting, we begin by choosing the right joint compound for the size and location of the repair, then feather each coat well beyond the patched area. This gradual transition is what keeps a repair from reading as a raised square once light hits the wall at an angle.
For most small holes, seams, and surface damage, a setting or all-purpose compound provides a dependable base. The first coat embeds tape or fills the repair; later coats widen and refine the surface. Allow the mud to dry completely between applications. Rushing this stage can leave shrinkage, cracking, or soft spots that show through primer and paint.
Sanding drywall takes a measured touch. Use a sanding block or pole sander with fine-grit paper, working lightly across the outer edges of the compound rather than digging into the center of the patch. A broad, smooth blend matters more than removing every trace of texture at once.
After dust is removed, a final skim coat can address any remaining imperfections. Prime the finished drywall repair before painting, especially over fresh compound, so the repaired area absorbs paint evenly and the finish remains uniform from wall to wall.
A clean drywall patch is only half of a successful wall repair. The finish has to disappear into the surrounding surface, which means treating texture, primer, color, and sheen as one coordinated system. Even a smooth-looking wall can have a subtle orange-peel pattern, roller stipple, or hand-troweled character that becomes obvious once fresh paint catches the light. MrWalls Drywall & Painting evaluates the existing surface before applying compound, then recreates the texture with the right tools and application method rather than relying on a one-size-fits-all spray.
Primer comes next, and it does more than prepare the repair for paint. New compound is porous and absorbs paint differently than a previously painted wall; without primer, the patched area may flash dull, look darker, or show a noticeable change in sheen. A properly selected primer evens out absorption so the finish coat reads consistently across the full wall.
Paint matching is equally nuanced. The original color may have faded with sunlight, cleaning, and time, so a formula from an old can may not always be a perfect answer. We can assess the wall under natural lighting and recommend whether a carefully blended touch-up will hold or whether painting from corner to corner will create a more seamless result. Finally, sheen matters: flat, matte, eggshell, satin, and semi-gloss reflect light differently. Matching the existing sheen keeps a repaired area from announcing itself every time daylight moves across the room.
A drywall patch can look simple at first, then reveal its flaws as the paint dries or the room’s changing light catches every ridge. At MrWalls Drywall & Painting, we most often see problems caused by rushed preparation: a patch that is not firmly supported, tape that was applied over dust, or joint compound spread too thickly in one pass. The good news is that most of these issues have a straightforward repair when addressed before repainting.
If tape is lifting at an edge, cut away the loose section rather than trying to bury it under more compound. Reapply fresh paper tape with a thin, even bed of joint compound, pressing out air pockets with a broad knife. Mesh tape is useful for small holes and stable seams, but it needs a setting-type compound to help prevent cracks from returning. For wider patches, paper tape generally creates a flatter, more durable finish.
Visible humps, shallow depressions, and flashing under paint usually point to uneven feathering. Build the repair in several thin coats, widening each coat beyond the previous one so the transition disappears into the surrounding wall. Allow each layer to dry fully before sanding drywall; sanding damp compound can tear the surface and leave a fuzzy paper face. Use a fine abrasive and a work light held at an angle to find imperfections without over-sanding.
When the drywall paper has torn, seal it before applying compound. Otherwise, moisture can raise the paper and create blisters beneath the finished surface. A quality sealer, patient prep, and properly blended patches make the final paint finish look intentional, not repaired.
Not every mark on a wall calls for the same response. A pinhole left by artwork, a shallow scuff from furniture, and a dent from a door handle are often manageable DIY projects when the drywall itself feels firm and the damage is limited to the surface. With the right patching compound, sanding technique, and paint match, small wall repair jobs can restore a tidy finish without much disruption at home.
Move-out repairs deserve a more exacting standard. Rental inspections tend to reveal poorly blended patches, uneven texture, flashing under fresh paint, and nail holes that were filled but not properly sanded. If you are preparing a home for new tenants, listing it for sale, or hoping to recover a security deposit, take a room-by-room look in daylight. Grouping minor drywall repair work before painting is usually more efficient than addressing each imperfection separately.
A professional assessment is the better choice when damage is wider than a few inches, near a corner or seam, repeated in the same area, or accompanied by softness, staining, cracking, or a visible bulge. Those signs can point to moisture, movement, or an issue behind the wall that a surface-level repair will not solve. At MrWalls Drywall & Painting, we evaluate the condition of the drywall, the surrounding finish, and the likely cause before recommending a repair. That approach helps protect both the appearance and long-term condition of your building, whether you need one carefully matched patch or a more complete wall restoration.
Homeowners often ask whether patching drywall holes in walls is a realistic DIY job or better left to a professional. The answer depends on the hole’s size, location, and cause. A pinhole from a picture hook can usually be filled and touched up quickly. A larger opening, especially one near an outlet, a corner, or a water-damaged area, may need backing support, a properly sized drywall patch, tape, and several carefully feathered coats of joint compound.
Another common question is how long a repair takes. The physical work is often straightforward, but drying time matters. Joint compound should dry fully between coats before sanding and repainting; rushing this process can leave a visible ridge, uneven sheen, or a patch that telegraphs through the finish. Texture matching can also add time, particularly on orange-peel, knockdown, or older hand-textured walls.
People also wonder why a repaired spot is still noticeable after painting. In many cases, the repair itself is sound, but the paint color, sheen, or application method does not blend with the surrounding drywall. A professional can assess whether the wall needs a spot repair, a wider blend, or repainting from corner to corner for a seamless result.
MrWalls Drywall & Painting approaches each repair with the finish in mind, not simply the hole. We identify the underlying issue, build a stable surface, blend the repair into the existing wall, and prepare it for paint so the room looks cared for again.
Inspect the area for electrical wiring, plumbing, moisture stains, soft drywall, and loose material. Turn off power at the breaker when working near outlets or switches. In older homes, avoid sanding or cutting unfamiliar finishes until suspect materials have been assessed.
Lightweight compound works well for nail holes, shallow dents, and small screw holes. Larger holes need reinforcement, such as a mesh repair patch or a fitted drywall piece with wood backing, before joint compound is applied.
Small holes can often be filled with compound, while openings around 4 to 6 inches usually benefit from a self-adhesive drywall repair patch. Larger openings should be cut to sound edges and repaired with matching drywall supported by studs or backing strips.
Most patches need two or three thin coats. The first coat fills the repair or covers tape, while later coats are feathered wider to blend the patch into the wall. Let each coat dry fully before sanding or applying the next one.
Mesh tape is convenient for small, stable repairs and patched openings because it sticks directly to the wall. Paper tape is a strong option for flat seams and areas where slight movement may occur. Both require properly applied joint compound for a smooth finish.
A visible patch is commonly caused by thick compound, narrow feathering, uneven sanding, or skipping primer. Use thin coats, spread each coat farther beyond the repair, inspect with side lighting, and prime fresh compound before applying touch-up paint.
Do not cover water-damaged drywall until the source of moisture is fixed and the area is completely dry. Replace soft, swollen, stained, or crumbling drywall rather than patching over it, since hidden moisture can lead to continuing damage.