Mold Damaged Drywall Removal and Replacement: DIY or Hire?
If your drywall feels soft or looks like a science experiment, it's time to cut it out. You can't just paint over mold and hope for the best. Mold grows inside the paper backing of wet drywall.
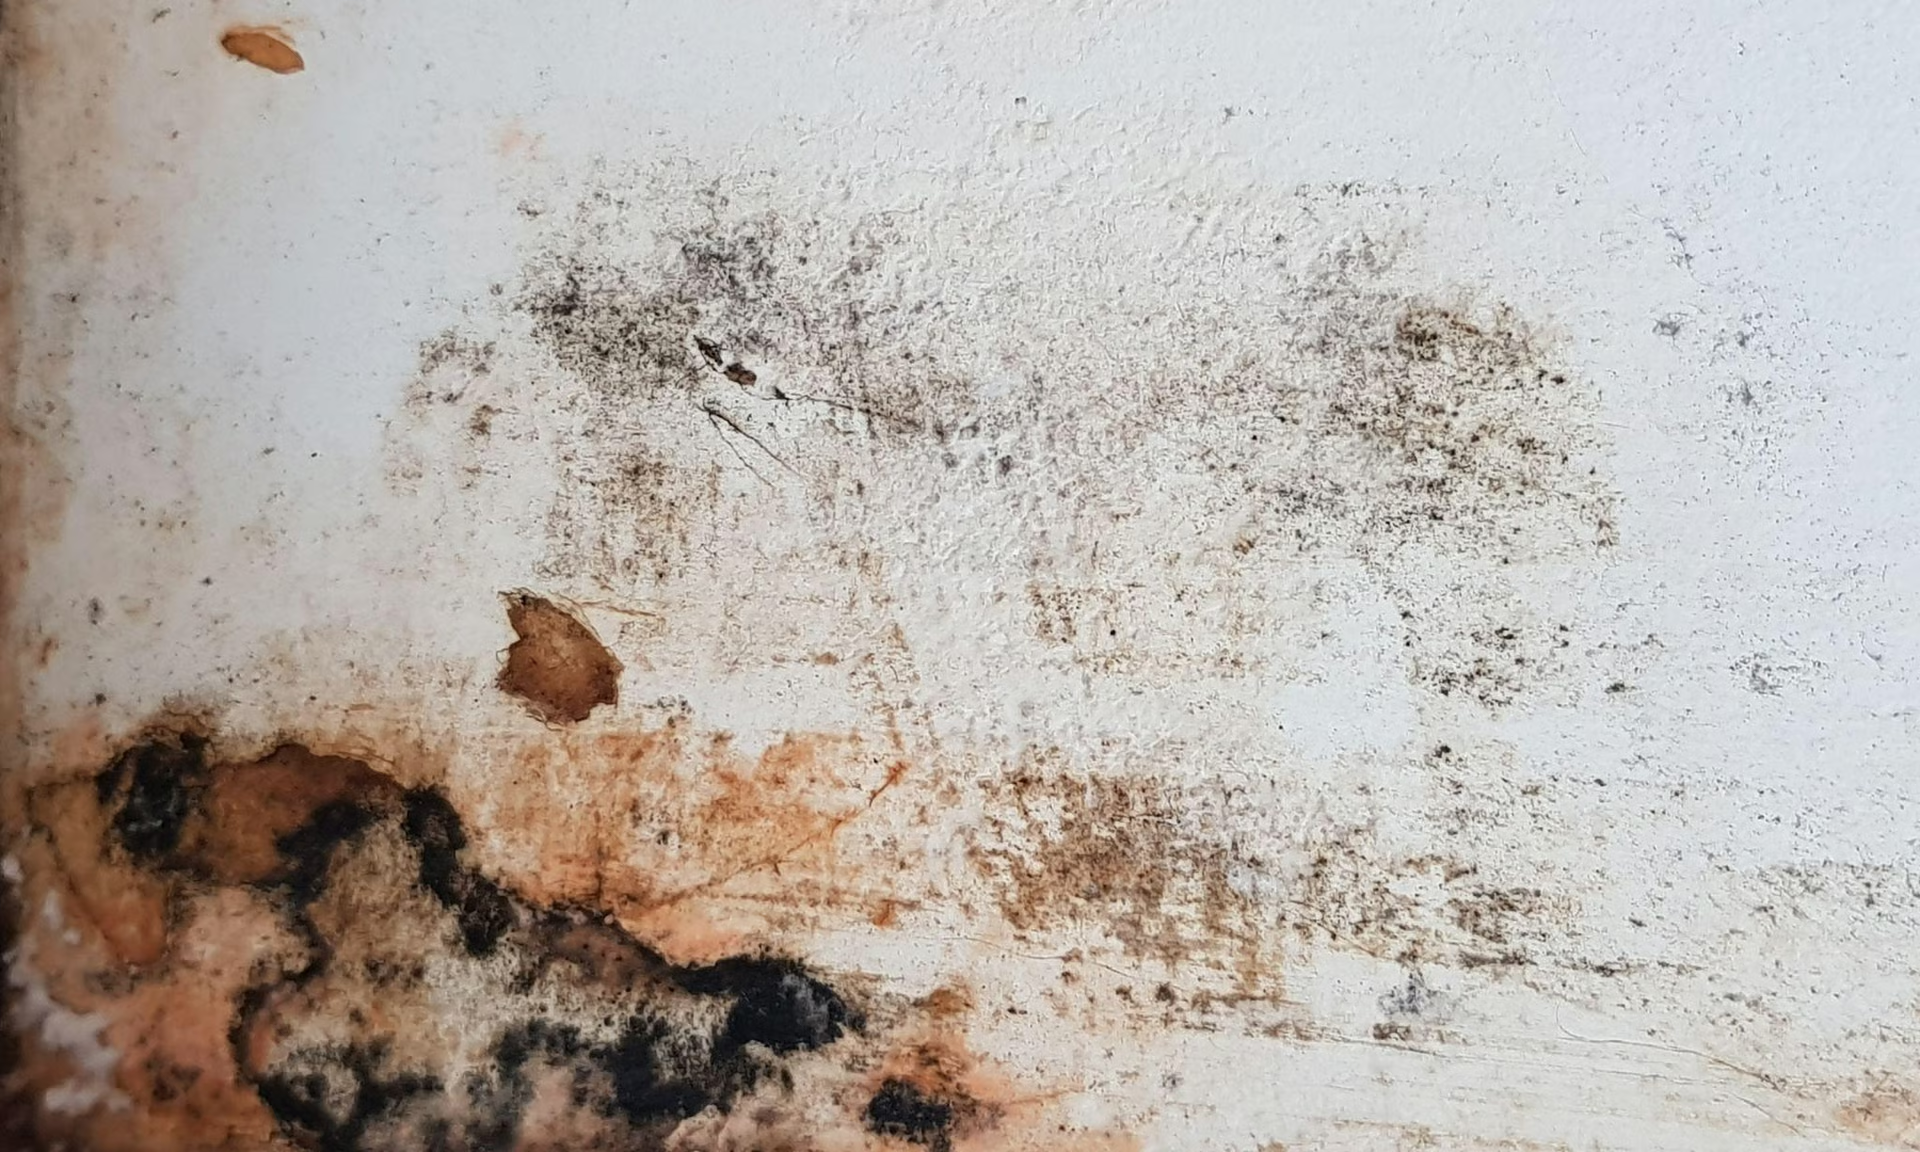
Mold-damaged drywall calls for more than a surface fix when the paper facing, gypsum core, or insulation is affected. In a basement or elsewhere in the building, a moisture problem can turn visible mold into deeper mold damage behind walls, especially after flooding, an emergency leak, or other water damage. The first step is always to stop the moisture source, assess affected drywall, and determine whether mold can be removed without disturbing surrounding materials.
For a small, contained area, mold removal may involve careful tools, soap, and vinegar, though a diluted vinegar solution is more effective than simply cleaning the surface alone. Larger drywall mold concerns, recurring water intrusion, or contamination within insulation require a qualified iicrc-informed professional for mold remediation, remediation, removal, restoration, and related services. Their assessment can clarify the cost of drywall repair versus drywall replacement, whether to cut and replace drywall, and how insurance may respond. In cases requiring mold damaged drywall removal and replacement, removal mold work should protect the home as thoroughly as it repairs it.
⚡ Key takeaways
- Stop and correct the moisture source before cleaning, cutting, or replacing drywall.
- Clean only small, dry, surface-level mold on intact painted drywall; porous, softened board usually requires removal.
- Open walls beyond visible staining, often at least 12 inches, and inspect framing and insulation for hidden moisture.
- Remove wet or contaminated insulation and dry the cavity completely before installing new insulation or drywall.
- Hire qualified remediation professionals for widespread, recurring, flood-related, concealed, HVAC, ceiling, or insulation mold.
- Document damage, estimates, invoices, and suspected causes before cleanup to support potential insurance claims.
Mold-damaged drywall often needs replacement, not just cleaning, when moisture has penetrated the board, caused softening or odors, or may have contaminated the wall cavity. Stop the water source, open the wall beyond visible damage, inspect insulation and framing, and dry everything fully before rebuilding. DIY may suit small, dry surface spots, but widespread, recurring, hidden, or flood-related mold calls for professional remediation and documented repairs.
Mold Damaged Drywall Removal and Replacement: When Replacement Is the Right Fix
Mold damaged drywall removal and replacement is often the safest course when moisture has traveled beneath the painted surface. Mold damage and water damage can compromise gypsum, contaminate affected drywall, and leave persistent odors that cleaning cannot resolve. MrWalls Drywall & Painting assesses whether precise removal can succeed or whether it is time to replace drywall and restore a clean, durable finish.
Surface Drywall Mold: When Simply Cleaning Is Not Enough
Small areas of drywall mold can appear to be a surface problem: a few dark spots near a bathroom ceiling, around a window, or beside a minor plumbing leak. If the board is dry, firm, and the visible mold is limited to a non-porous painted finish, careful cleaning may be appropriate once the moisture source has been corrected. In that narrow circumstance, mold can be removed from the finish without opening the wall.
But simply cleaning is not a repair plan when drywall has softened, bubbled, stained through, or developed a persistent musty smell. Drywall is porous. Once moisture reaches its paper facing or gypsum core, mold may grow behind the surface, where soap, vinegar, or paint cannot reliably address it. A diluted vinegar solution is more effective than soap for light surface residue, but it should never be treated as proof that the wall is clean inside.
We look beyond what is visible. Recurrent staining, peeling paint, damp insulation, and a history of water damage all point to concealed moisture. In those cases, the proper approach is to remove mold-affected materials, dry the cavity, correct the water issue, and install new board. That process protects the surrounding finish and prevents a cosmetic clean-up from becoming a larger drywall repair later.
When Drywall Mold May Be Cleaned vs. When Material Should Be Removed
| Condition to assess | Cleaning may be appropriate when | Removal and replacement are indicated when |
|---|---|---|
| Board condition | The drywall is dry and firm. | The drywall has softened or bubbled. |
| Visible mold or staining | Visible mold is limited to a non-porous painted finish, such as a small area of surface residue. | Staining has penetrated through the board or returns after cleaning. |
| Moisture source | The moisture source has been corrected before cleaning. | There is a leak history or an unresolved water issue. |
| Odor | No persistent musty smell is present. | A persistent musty smell suggests moisture or mold may be within the drywall. |
| Signs of concealed moisture | There are no signs of moisture beyond the painted surface. | Peeling paint, damp insulation, or recurrent staining point to concealed moisture and affected material should be removed. |
Find the Water Source and Assess Mold Damage Beyond the Visible Area
Before any repair begins, the water source must be identified and stopped at its origin. Even a small moisture problem behind walls, beneath flooring, or in a basement can continue to compromise a building long after visible mold has been cleaned away. MrWalls Drywall & Painting evaluates moisture, water damage, affected drywall, insulation, and the full affected area, so mold damage is addressed completely, not sealed behind new finishes.
How Far to Cut Mold-Damaged Drywall and Check Insulation
Drywall mold rarely stops exactly where a stain does. Water can wick through gypsum paper and track along framing, which means the affected drywall should be opened far enough to expose clean, dry material on every side. As a practical starting point, crews often cut at least 12 inches beyond visible growth or water staining, ideally along a stud line so the replacement panel has solid backing. The final cut should always be guided by the actual condition inside the wall, not an arbitrary measurement.
After the mold-damaged drywall is removed, inspect the back of the sheet, the studs, sill plate, and any insulation. Wet fiberglass insulation can hold moisture and dust, while cellulose insulation may clump, sag, or retain contamination after a leak. Insulation that is wet, visibly contaminated, or cannot be dried thoroughly should be removed rather than concealed during repair.
Dry the cavity completely and correct the leak, condensation issue, or exterior water entry before installing replacement insulation and drywall. If growth is extensive, repeatedly returns, or extends through a larger concealed area, professional mold remediation may be appropriate before reconstruction. Careful opening, cleaning, and drying protect the new repair and help prevent the same problem from returning behind freshly painted walls.
DIY Safety Boundaries: When Mold Remediation Needs a Professional
Small, surface-level mold spots may be manageable for a homeowner when the moisture source has been corrected and the affected area is limited, dry, non-porous, and easy to reach. Even then, visible mold is only part of the picture. Mold remediation is not simply cleaning a surface; it requires finding the underlying moisture problem, protecting adjacent materials, containing disturbed spores, and determining whether mold can be removed or whether damaged components require removal, repair, or replacement.
It is time to call a professional when mold:
- Is widespread, recurs after cleaning, or suggests ongoing mold damage within the building
- Appears after flooding, an emergency leak, or other significant water damage
- Involves drywall mold, affected drywall, mold-damaged drywall, insulation, plaster, ceilings, or HVAC components
- May be tied to hidden moisture behind finished walls, above ceilings, or in a basement
Hidden moisture can travel behind finished walls and above ceilings, turning an apparently modest stain into a larger removal mold project than expected. While soap, vinegar, and common tools may address minor surface residue, simply cleaning does not resolve a deeper moisture problem; nor does the claim that a diluted vinegar solution is more effective replace a proper assessment. A qualified restoration team can evaluate affected materials, determine whether to remove mold, cut into walls, replace drywall, or complete drywall repair, and establish containment that limits debris in occupied rooms. This is especially important after an emergency water event, when prompt drying, insurance documentation, and informed decisions about mold damaged drywall removal and replacement can protect indoor air quality and help manage long-term cost. Look for professionals who follow recognized iicrc guidance and can explain the scope of remediation in plain language: what will be removed, what can be cleaned, how the area will be dried, and how drywall replacement or other repairs will be completed. At MrWalls Drywall & Painting, our restoration services address the practical realities homeowners face after leaks and water damage, from mold removal and restoration to restoring compromised interiors. DIY has a place in routine care, but hidden contamination, extensive mold remediation, and post-flooding cleanup deserve professional oversight.
When to Call Professionals
- Handle only small, dry mold spots on non-porous surfaces after stopping the moisture source.
- Call a professional when mold covers large areas, returns after cleaning, or follows flooding.
- Seek assessment for mold affecting drywall, insulation, plaster, ceilings, or HVAC components.
- Assume moisture may extend behind walls or above ceilings, even when visible staining seems minor.
- Choose restoration teams that use containment to limit spores and debris in occupied rooms.
- Ask for a clear remediation scope covering removal, cleaning, drying, and completed repairs.
- Look for qualified professionals who follow recognized IICRC guidance for water damage and mold work.
Plan the Removal: Tools, Materials, Containment and Disposal
A clean popcorn ceiling removal begins long before the first pass of a scraper. Assemble the proper tools and materials for a disciplined, controlled sequence: drop cloths, plastic sheeting, painter’s tape, a pump sprayer, wide drywall knives, sanding equipment with dust collection, heavy-duty bags, and personal protective equipment. Remove or fully cover furniture, protect floors wall to wall, and seal doorways, vents, and return-air openings so dust stays contained rather than traveling through the home.
Water changes the plan. A stained or sagging ceiling may point to an active roof, plumbing, or condensation issue that must be corrected before removal begins. Once the surface is open, inspect for mold, softened framing, wet insulation, and affected drywall. Small, isolated concerns may fit within the repair scope; widespread growth, persistent moisture, or questionable material warrants a qualified remediation professional before refinishing.
Older popcorn textures require added caution. Before disturbing a ceiling installed before modern material standards, arrange appropriate testing rather than assuming it is safe to scrape. This protects everyone in the home and clarifies whether specialized removal and disposal are required.
Finally, plan for debris with the same care as the removal itself. Texture waste becomes heavy when wet, and drywall fragments should be bagged promptly to limit dust and streamline cleanup. Local disposal rules may vary for construction debris and potentially contaminated materials. At MrWalls Drywall & Painting, we consider containment, moisture assessment, and responsible disposal essential to finish quality, not an afterthought to drywall repair.
Removal Planning Checklist
- Gather drop cloths, plastic sheeting, painter’s tape, pump sprayer, drywall knives, dust-controlled sanding tools, bags, and protective equipment.
- Remove furniture or cover it completely; protect floors wall to wall before beginning any scraping or sanding.
- Seal doorways, vents, and return-air openings with plastic to prevent dust from spreading through the home.
- Repair active roof, plumbing, or condensation leaks before removal; investigate stains, sagging areas, and softened drywall.
- Inspect opened ceiling areas for mold, wet insulation, damaged framing, and widespread moisture requiring professional remediation.
- Arrange material testing for older popcorn ceilings before disturbing the texture, especially when installation dates are uncertain.
- Bag wet texture waste and drywall fragments promptly; confirm local disposal requirements for construction debris or contaminated materials.
Rebuild Only After the Wall Cavity Is Dry and Ready
Drywall replacement belongs at the end of a water damage project, not as the first visible signal that work has begun. Before MrWalls Drywall & Painting closes a wall, we confirm that the source of moisture has been corrected and that the cavity has had sufficient time to dry thoroughly. A fresh sheet of drywall may make a room appear restored in the moment, but it cannot resolve damp framing, wet insulation, or concealed microbial growth behind the surface.
The right drywall repair starts with a clear, uncompromising view inside the affected area. Damaged drywall is removed far enough to reveal the full extent of the loss, including softened paper, swollen gypsum, compromised baseboards, and insulation that has taken on water. The wall cavity can then be dried with proper airflow and dehumidification while framing is evaluated for lingering moisture, staining, or deterioration. This is particularly important in older homes, where plaster transitions, exterior walls, and previous repairs can retain moisture in unexpected places.
Only when the structure is dry, stable, and clean is it time for drywall replacement. New insulation is installed where needed, followed by precisely fitted board, secure fastening, carefully taped seams, and a finish that integrates naturally with the surrounding walls. The materials should match the demands of the room: moisture-resistant options may be well suited to bathrooms, laundry areas, and other spaces with recurring humidity, while standard board may be appropriate for a fully dry interior space.
Thoughtful restoration is not about covering the evidence quickly; it is about rebuilding with confidence. Whether the project involves a small ceiling leak or a larger water damage event, our team approaches drywall repair with one goal: a sound wall assembly beneath a polished painted finish. When the cavity is genuinely ready, the completed repair looks seamless, and is built to remain that way.
DIY or Hire: Choosing Services, Scope, Cost and Insurance Documentation
A small dent, nail-pop, or scuffed wall can be a sensible DIY project when the surface is dry, stable, and unlikely to affect a textured finish or a large painted area. The equation changes quickly when damage involves a ceiling, recurring cracks, softened drywall, staining, or more than one room.
- DIY may be appropriate for: minor, dry, isolated defects with a straightforward finish.
- Professional services are worth considering for: ceiling damage, recurring cracks, softened drywall, staining, or repairs across multiple rooms.
- Address water damage first: trace the source before patching, then allow drying, restoration, and drywall repair to proceed.
- Document insurance claims: photograph damage before cleanup, retain estimates and invoices, note the suspected cause, and save correspondence with your carrier.
In these situations, professional services can keep a cosmetic repair from masking a more serious condition. Water damage, for example, should be traced to its source before patching begins. A plumber may need to correct a leaking supply line, drain, roof-adjacent fixture, or appliance connection; only then can drying, restoration, and drywall repair proceed with confidence. If materials have remained wet or a musty odor persists, mold remediation may be required before new board, plaster repair, texture, or paint is installed. The initial cost of hiring a specialist may exceed that of a weekend repair kit, yet it often includes proper moisture assessment, containment where needed, matching materials, and a finish that does not call attention to itself. For insurance claims, documentation matters as much as the visible result. A qualified contractor can clearly separate emergency drying or restoration work from finish repairs, helping homeowners present an organized scope to insurance adjusters. At MrWalls Drywall & Painting, we advise clients to reserve DIY work for truly minor, dry, isolated defects and bring in experienced help whenever the condition, source, or final finish is uncertain.
DIY or hire checklist
- Choose DIY for small, dry, isolated dents, nail pops, or scuffs on stable walls.
- Hire a professional for ceiling damage, recurring cracks, softened drywall, stains, or multi-room repairs.
- Find and fix water sources before patching, including leaks from plumbing, appliances, fixtures, or roofing.
- Arrange drying and possible mold remediation when materials stayed wet or musty odors are present.
- Consider specialists for textured surfaces or broad painted areas requiring careful material and color matching.
- Photograph damage before cleanup; save estimates, invoices, suspected-cause notes, and insurer correspondence.
- Request separate scopes for emergency drying, restoration, and finish repairs to support insurance claims.
Prevent Mold-Damaged Drywall in Bathrooms, Kitchens and Basements
Mold-damaged drywall rarely begins with an obvious disaster. More often, it starts with a slow plumbing seep behind a vanity, humid shower air lingering in a poorly ventilated bathroom, or a small basement leak unnoticed after heavy rain. Because drywall’s paper facing and gypsum core readily retain moisture, even a modest amount of water can create the conditions in which mold takes hold behind the finished surface.
Prevention begins with controlling moisture before it becomes a larger building concern. Run a properly sized exhaust fan during showers and for at least 20 minutes afterward. In kitchens, address leaks beneath sinks, around dishwasher connections, and behind refrigerator water lines without delay. In a basement, manage humidity with a dehumidifier, keep exterior gutters and downspouts clear, and inspect foundation walls, window wells, and pipe penetrations for signs of intrusion. A musty odor, softened drywall, staining, bubbling paint, or peeling baseboards may all point to concealed mold damage.
When water reaches drywall, speed matters. Dry wet materials thoroughly within 24 to 48 hours whenever possible, and do not simply paint over discoloration or use caulk to conceal a gap. If the drywall is swollen, crumbling, repeatedly damp, or visibly affected by mold, removal and replacement may be the sounder long-term repair. Correct the source of the water first; otherwise, new finishes are likely to fail.
MrWalls Drywall & Painting helps homeowners assess damaged wall and ceiling surfaces, complete clean, durable drywall and plaster repair, and restore rooms with finishes suited to everyday humidity. Thoughtful maintenance and timely repair protect not only a room’s appearance, but also the comfort and integrity of the home behind the walls.
Moisture Prevention Checklist
- Run bathroom exhaust fans during showers and at least 20 minutes afterward to reduce lingering humidity.
- Repair plumbing leaks promptly beneath sinks, near dishwashers, behind vanities, and around refrigerator water lines.
- Use a dehumidifier in basements and regularly check humidity levels, foundation walls, window wells, and pipe penetrations.
- Keep gutters and downspouts clear so rainwater drains away from the foundation instead of entering basement walls.
- Watch for musty odors, staining, bubbling paint, softened drywall, peeling baseboards, or swollen wall surfaces.
- Dry water-affected drywall and surrounding materials within 24 to 48 hours whenever possible.
- Replace drywall that is crumbling, swollen, repeatedly damp, or visibly mold-affected after correcting the moisture source.
Frequently Asked Questions About How to Remove Mold From Drywall
When homeowners ask how to remove mold from drywall, the answer depends on the extent of the affected drywall, the condition of the surface, and the underlying moisture problem. Small areas of visible mold on sound, dry walls may allow for careful mold removal with soap and water or vinegar; some guidance suggests a diluted vinegar solution is more effective than harsh chemicals for lightly affected materials. Still, simply cleaning a surface will not resolve drywall mold when moisture has penetrated the paper facing, insulation, or wall cavity. Avoid saturating the area, using abrasive tools, or painting over stains before the wall is dry and the source of water has been corrected.
Mold can be removed from limited, nonstructural surface growth, but mold damaged drywall often requires more decisive work. After a plumbing leak, roof intrusion, basement seepage, or flooding, mold-damaged drywall may feel soft, swollen, crumbly, or discolored. In those cases, drywall removal, a careful cut around compromised sections, and drywall replacement are generally more reliable than attempting removal mold from within damaged materials. Effective mold damaged drywall removal and replacement should include drying the building assembly, addressing water damage, and repairing the source of moisture. Without a proper repair, mold can return behind fresh paint and compromise the restoration.
For a larger affected area, recurring mold, musty odors, emergency water damage, or suspected contamination behind walls, professional mold remediation is the prudent choice. Qualified remediation services can contain the work area, remove compromised materials, replace drywall, complete drywall repair, and restore the finish with appropriate iicrc-informed practices. The cost of professional removal and restoration varies with the scope of mold damage, access, and the condition of surrounding insulation and framing. Insurance may cover certain sudden water events, though coverage differs by policy and cause; document the damage, retain invoices, and contact your insurance provider before major demolition when possible. MrWalls Drywall & Painting provides professional services to assess affected drywall, coordinate repair, and complete a lasting restoration once the moisture issue is resolved.
Frequently asked questions
When should mold-damaged drywall be replaced instead of cleaned?
Replace drywall when it is soft, swollen, bubbling, stained through, musty smelling, or affected by moisture behind the painted surface. Cleaning may suit a small, dry area of surface residue on an intact painted finish after the moisture source has been fixed.
How far beyond visible mold should drywall be removed?
A common starting point is at least 12 inches beyond visible mold or water staining, ideally cutting along stud lines. The final removal area should be based on the condition inside the wall, including the drywall backing, framing, and insulation.
Can mold grow behind drywall without being visible?
Yes. Drywall is porous, and moisture can reach the paper facing, gypsum core, insulation, and framing before mold becomes visible. Peeling paint, recurring stains, musty odors, and a history of leaks can indicate concealed damage.
Do I need to replace wet insulation after a leak?
Wet, contaminated, clumped, or sagging insulation should generally be removed. Fiberglass can hold moisture and debris, while cellulose may lose its shape and retain contamination. The wall cavity should be dry before new insulation and drywall are installed.
When should I hire a mold remediation professional?
Professional assessment is appropriate for widespread or recurring growth, flood damage, mold involving drywall or ceilings, suspected hidden moisture, HVAC concerns, or damage extending beyond a small isolated area. A qualified team can contain the work, remove affected materials, dry the area, and prepare it for reconstruction.
Does homeowners insurance cover mold-damaged drywall replacement?
Coverage depends on the policy and the cause of the water damage. Photograph the damage before cleanup, save estimates and invoices, document the suspected source, and contact the insurance carrier promptly. Sudden covered water events may be treated differently from long-term leaks or maintenance issues.
Can new drywall be installed before the wall cavity is dry?
No. The leak, condensation issue, or water entry point must be corrected first. Framing, insulation, and surrounding materials should be dry, stable, and clean before replacement drywall is installed, taped, finished, and painted.