
Guide to Patch a Drywall Hole Like a Pro
Transform unsightly drywall holes into flawless walls with our step-by-step guide. Master the art of patching like a professional and enhance your home's appeal!
PATCHINGDRYWALL REPAIRFIXING A HOLE
MrWalls Drywall & Painting
3/13/20267 min read

Step-by-Step Guide to Patch a Drywall Hole Like a Pro
Transform unsightly drywall holes into flawless walls with our step-by-step guide. Master the art of patching like a professional and enhance your home's appeal!
Understanding Drywall and Common Causes of Holes
Drywall, also known as plasterboard or gypsum board, is a construction material widely used to create walls and ceilings. Its popularity stems from its affordability, ease of installation, and smooth finish, making it a staple in modern home building and renovation projects. Drywall consists of a gypsum core sandwiched between two thick sheets of paper, providing a sturdy yet lightweight structure. However, despite its many advantages, drywall can be susceptible to damage, especially when subjected to impact or moisture.
Common causes of drywall holes include accidental impacts, such as furniture mishaps or doors being flung open too forcefully. In households with children, it's not unusual for toys or other objects to cause dents or punctures. Additionally, home improvement projects, such as installing shelving or wall mounts, can sometimes result in unintended damage. Another frequent cause is plumbing or electrical work, where holes are cut to access pipes or wiring behind the walls. Over time, these small openings can become more noticeable and unsightly if left unaddressed.
Moisture damage is another culprit, often leading to softening and eventual holes in the drywall. Leaking roofs, plumbing issues, or high humidity levels can compromise the integrity of drywall, causing it to weaken and deteriorate. Identifying the root cause of the damage is crucial because simply patching the hole without addressing the underlying issue may result in recurrent problems. Understanding these common causes helps homeowners take proactive measures to protect their drywall from future damage, ensuring a longer lifespan and better overall appearance.
Tools and Materials Needed for Drywall Repair
To effectively patch a drywall hole, having the right tools and materials on hand is essential. This not only ensures a seamless repair but also makes the process more efficient and less frustrating. The basic tools required for drywall repair include a utility knife, a putty knife, a drywall saw, and a sanding block or sandpaper. These tools allow you to cut, shape, and smooth the drywall as needed. A tape measure is also handy for measuring the size of the hole and cutting the patch to the correct dimensions.
In addition to tools, specific materials are necessary for a successful repair. Drywall patches or pieces of new drywall are used to cover the hole. For small holes, a pre-made patch can suffice, while larger holes may require a custom-cut piece of drywall. Joint compound, also known as mud, is used to adhere the patch to the existing wall and create a smooth, even surface. Drywall tape, either paper or mesh, is essential for reinforcing the seams around the patch, preventing future cracking.
Other materials that might be needed include primer and paint to match the existing wall color, as well as a drop cloth to protect the surrounding area from dust and debris. For more extensive repairs, corner beads or metal reinforcements may be required to maintain the structural integrity of the wall. By gathering all necessary tools and materials before starting the repair, you can ensure a smoother, more efficient process and achieve professional-looking results.
Assessing the Damage: Determining the Size of the Hole
Before diving into the repair process, assessing the damage to determine the size and extent of the hole is crucial. This step helps you decide on the appropriate repair method and ensures that you gather the right materials and tools for the job. Start by examining the hole closely, noting any additional damage such as cracks or crumbling drywall around the edges. Measure the diameter or dimensions of the hole using a tape measure, as this will guide you in selecting the correct patch size.
Small holes, typically less than 1/2 inch in diameter, are often caused by nails, screws, or minor impacts. These can be easily repaired using a simple filler or patch kit. Medium-sized holes, ranging from 1/2 inch to 6 inches, may result from more significant impacts or the removal of fixtures. These require a bit more effort, often involving a piece of new drywall and joint compound to create a seamless repair. Larger holes, anything over 6 inches, usually result from substantial damage such as plumbing repairs or accidents. These require a more comprehensive approach, including cutting out the damaged area and replacing it with a new piece of drywall.
In addition to measuring the hole, it's essential to check for any underlying issues that may have caused the damage. For instance, if the hole resulted from moisture, ensure that the source of the leak is fixed before proceeding with the repair. Similarly, if the damage was caused by structural issues, address those problems to prevent future occurrences. By thoroughly assessing the damage and understanding its cause, you can choose the most effective repair method and ensure a long-lasting result.
Preparing the Area for Repair
Proper preparation is key to a successful drywall repair. Start by clearing the area around the hole, removing any loose debris, dust, or flaking paint. Use a utility knife to cut away any jagged edges or loose paper, creating a clean, smooth surface. If the hole is large, you may need to use a drywall saw to trim the damaged area into a neat, rectangular shape. This makes it easier to fit a new piece of drywall and ensures a tighter, more secure repair.
Next, place a drop cloth or plastic sheeting on the floor to catch any dust and debris generated during the repair process. This protects your flooring and makes cleanup easier. If you're working near electrical outlets or switches, turn off the power to that area to avoid any accidental shocks. It's also a good idea to wear safety goggles and a dust mask to protect yourself from drywall dust and debris.
Once the area is clean and prepped, gather all your tools and materials within easy reach. Having everything organized and accessible will save time and reduce frustration as you work through the repair steps. If you're using a pre-made patch, ensure it fits snugly over the hole. For custom-cut patches, measure and cut the new piece of drywall to match the dimensions of the hole. By taking the time to properly prepare the area and gather your tools, you'll set yourself up for a successful and efficient repair process.
Step-by-Step Process to Patch Small Holes
Patching small holes in drywall is a relatively simple process that can be completed with minimal tools and materials. Start by cleaning the area around the hole, removing any dust or debris. Use a utility knife to cut away any loose or damaged drywall, creating a smooth surface. If the hole is smaller than 1/2 inch, you can use a pre-made patch or filler to cover it.
Apply a small amount of joint compound or spackling paste to the hole using a putty knife. Spread the compound evenly, ensuring that it fills the hole completely and extends slightly beyond the edges. Smooth the surface with the putty knife, removing any excess compound. Allow the compound to dry according to the manufacturer's instructions, which typically takes a few hours.
Once the compound is dry, use a sanding block or fine-grit sandpaper to smooth the surface. Sand lightly in a circular motion, blending the edges of the compound with the surrounding wall. Wipe away any dust with a damp cloth. If necessary, apply a second coat of joint compound to achieve a smooth, even surface. Allow it to dry and sand again as needed. Finally, prime and paint the repaired area to match the rest of the wall, completing the seamless repair.
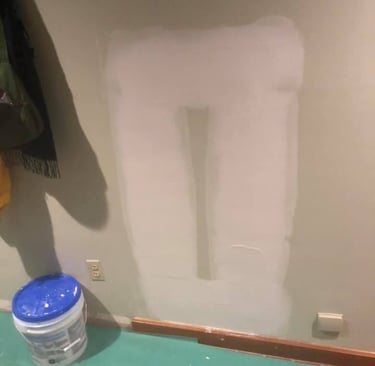
Step-by-Step Process to Patch Large Holes
Repairing large holes in drywall requires a bit more effort and precision, but with the right approach, you can achieve professional-looking results. Begin by preparing the area, as described earlier. Use a drywall saw to cut out the damaged section, creating a clean, rectangular hole. Measure the dimensions of the hole and cut a new piece of drywall to fit. Ensure that the patch is slightly smaller than the hole to allow for joint compound and tape.
Place the drywall patch into the hole, ensuring it fits snugly. Secure the patch in place using drywall screws or adhesive. If using screws, ensure they are countersunk slightly below the surface of the drywall. Next, apply a layer of joint compound around the edges of the patch. Place drywall tape over the seams, pressing it into the compound. This reinforces the repair and prevents future cracking.
Apply a second layer of joint compound over the tape, feathering the edges to blend with the surrounding wall. Allow the compound to dry, then sand the surface smooth. Apply additional coats of joint compound as needed, sanding between each coat to achieve a seamless finish. Once the final coat is dry and smooth, prime and paint the repaired area to match the rest of the wall. This thorough process ensures a durable and professional-looking repair for large holes.
Finishing Touches: Sanding and Painting
The final steps in drywall repair involve sanding and painting to achieve a flawless finish. After applying the joint compound and allowing it to dry, use a sanding block or fine-grit sandpaper to smooth the surface. Sand in a circular motion, blending the edges of the compound with the surrounding wall. Take care not to over-sand, as this can create uneven surfaces or expose the underlying tape.
Once the surface is smooth, wipe away any dust with a damp cloth. Apply a coat of primer to the repaired area, ensuring an even application. Primer helps to seal the joint compound and creates a uniform surface for painting. Allow the primer to dry completely before proceeding to the next step.
Finally, apply paint to the repaired area, using a brush or roller to match the texture and finish of the surrounding wall. Depending on the color and type of paint, you may need to apply multiple coats for full coverage. Allow each coat to dry thoroughly before applying the next. By taking the time to sand, prime, and paint carefully, you'll achieve a professional-looking repair that seamlessly blends with the rest of the wall.
Tips for Preventing Future Drywall Damage
Preventing future drywall damage involves taking proactive measures to protect your walls from common causes of holes and dents. One of the simplest ways to prevent damage is to use doorstops or bumpers to prevent doors from swinging open too forcefully and hitting the walls. Installing protective guards on high-traffic areas, such as corners and hallways, can also help reduce the risk of accidental impacts.
When hanging heavy objects, such as mirrors or shelves, use appropriate anchors or wall mounts to distribute the weight evenly and prevent the drywall from cracking or sagging. Avoid overloading shelves or fixtures, as this can put undue stress on the drywall and lead to damage. Regularly inspect your walls for signs of moisture or leaks, and address any issues promptly to prevent water damage and mold growth.
In households with children or pets, consider using washable paint or wall coverings that can withstand bumps and scrapes. Educate family members about the importance of being mindful of the walls and avoiding rough play near them. By taking these preventive measures, you can protect your drywall from common sources of damage and maintain a pristine appearance for years to come.
When to Call a Professional for Drywall Repair
While many drywall repairs can be handled by homeowners, there are situations where calling a professional is the best course of action.
Home | Services | Contact | Offices | Faq | Service Area | Blog | Appointment | Drywall Finishing | Drywall Taping | Drywall Repair | Plaster Repair | Ceiling Repair | Wall Repair | Drywall Installation | Drywall Hanging | Popcorn Ceiling Repair | Crack Repair | Hole in Ceiling | Hole In Wall | Interior Painting | Knockdown Texture | Water Damage Repair | Drywall Bathroom | Drywall Ceiling | Soundboard | Drywall Patch | Black Mold | Ice Dam Roof Leak | Drywall over Plaster | Wallpaper Removal | Fix a Hole | Skim Coating | Popcorn Removal | Apartment Turnovers | Massachusetts | Western MA | Springfield | Chicopee | Ludlow | Wilbraham | Longmeadow | East Longmeadow | Monson | Palmer | Belchertown | Granby | Amherst | Hadley | Northampton | Easthampton | Westhampton | Holyoke | South Hadley | West Springfield | Hampden | Agawam | Westfield | Southampton | Southwick | Granville | Hatfield | Lenox | Beckett | Lee | Great Barrington | Stockbridge | Huntington | Middlefield | Pelham | Plainfield | Ware | Williamsburg | Worthington | Brimfield | Blanford | Holland | Montgomery | Tolland | Wales | Refund Policy | Privacy Policy | Terms and Conditions


600 East Main St Chicopee, MA, 01020
203 Circuit Ave n39, West Springfield, MA 01089

