
How to Repair Popcorn Ceiling Water Stains: A Step-by-Step Guide
Got unsightly water stains on your popcorn ceiling? Don't fret! Our step-by-step guide will help you repair those stains quickly and easily, restoring your ceiling’s charm.
CEILING WATER DAMAGEPOPCORN TEXTURE
How to Repair Popcorn Ceiling Water Stains: A Step-by-Step Guide
Got unsightly water stains on your popcorn ceiling? Don't fret! Our step-by-step guide will help you repair those stains quickly and easily, restoring your ceiling’s charm.
Understanding Popcorn Ceilings and Their Issues
Popcorn ceilings, also known as acoustic or stucco ceilings, gained popularity in the mid-20th century for their ability to dampen sound and hide imperfections. The texture is achieved by spraying a mixture of paint and a binding agent, often containing materials like vermiculite or polystyrene. This unique finish can add a certain vintage charm to a room, but it also comes with its own set of challenges. The rough surface easily accumulates dust and cobwebs, making cleaning a tedious task. Moreover, once water damage occurs, the texture can exacerbate the problem by holding onto moisture, leading to more extensive damage if not addressed promptly.
Water stains on popcorn ceilings are particularly problematic because the textured surface makes it difficult to perform a seamless repair. Unlike flat ceilings, where a simple coat of paint might suffice, repairing popcorn ceilings requires a more intricate approach to ensure the texture matches the surrounding area. Additionally, the materials used in older popcorn ceilings may contain asbestos, which poses significant health risks if disturbed. This makes it crucial to approach any repairs with caution and proper safety measures.
Understanding the properties and potential issues of popcorn ceilings prepares you for the task ahead. Knowledge about the composition and common problems associated with this type of ceiling allows you to plan effectively and avoid common pitfalls. Whether you're dealing with minor water stains or more significant damage, a methodical approach will help you achieve a satisfactory outcome.
Common Causes of Water Stains on Popcorn Ceilings
Water stains on popcorn ceilings can result from various sources, each requiring a different approach for a permanent fix. One of the most common causes is a leaky roof. Over time, even a small leak can cause water to seep through the attic and into your ceiling, resulting in unsightly stains. Seasonal changes, storms, or wear and tear can all contribute to roof leaks. Identifying and repairing the source of the leak is crucial to prevent further damage.
Another frequent culprit is plumbing issues. Leaky pipes, especially those running through ceilings, can lead to water stains. If the leak is minor, it may go unnoticed until the water has already caused significant damage to the ceiling. It's important to regularly inspect plumbing systems and address any leaks promptly to avoid such problems. Additionally, bathrooms located above the stained ceiling are often the source of water damage. Overflowing bathtubs, clogged drains, or leaking fixtures can all contribute to ceiling stains below.
Humidity and condensation can also cause water stains on popcorn ceilings. In areas with high humidity levels or inadequate ventilation, moisture can accumulate and eventually lead to staining. This is particularly common in bathrooms and kitchens. Installing proper ventilation systems and using dehumidifiers can help mitigate this issue. Understanding the root cause of the water stains is essential for effective repair and prevention of future occurrences.
Safety Precautions Before Starting Repairs
Before embarking on any repair work, especially on popcorn ceilings, it's vital to prioritize safety. One of the primary concerns is the potential presence of asbestos in older popcorn ceilings. Asbestos was commonly used in building materials before its health risks were widely recognized. If your home was built before the 1980s, there's a possibility that your popcorn ceiling contains asbestos. Disturbing asbestos can release harmful fibers into the air, posing serious health risks such as lung cancer and mesothelioma.
To determine if your ceiling contains asbestos, you can hire a professional to conduct a test. This involves taking a small sample of the ceiling material and sending it to a lab for analysis. If asbestos is present, it's recommended to hire a licensed asbestos abatement professional to handle the repairs. They have the expertise and equipment to safely remove and dispose of asbestos-containing materials. Attempting to remove asbestos yourself can be extremely dangerous and is not advisable.
In addition to asbestos concerns, other safety precautions should be taken. Ensure the area is well-ventilated by opening windows and using fans. Wear protective gear, including a dust mask, safety goggles, and gloves, to shield yourself from dust and debris. If you're working on a high ceiling, use a sturdy ladder or scaffolding to prevent accidents. Taking these precautions will help ensure your safety throughout the repair process.
Tools and Materials Needed for Repairing Water Stains
Having the right tools and materials on hand is essential for a successful repair job. Before you begin, gather everything you need to avoid interruptions and ensure a smooth process. Some basic tools you'll require include a utility knife, putty knife, sanding sponge, and paint roller. These tools will help you cut, apply, and smooth out materials as needed.
For the repair itself, you'll need specific materials such as joint compound, popcorn ceiling texture spray, and primer. Joint compound, also known as drywall mud, is used to fill in any gaps or seams. The popcorn ceiling texture spray is essential for matching the existing texture of your ceiling. You can find these sprays at most home improvement stores. It's important to choose a texture spray that closely matches your ceiling's existing texture to achieve a seamless look.
In addition to these materials, you'll need paint and primer to finish the job. Choose a high-quality ceiling paint that matches the color of your existing ceiling. Using a primer before painting helps ensure good adhesion and a uniform finish. Other helpful items include drop cloths to protect your floors and furniture, painter's tape to mask off areas, and a paint tray for easy application. Having all these tools and materials ready will make the repair process more efficient and effective.
Step-by-Step Guide to Assessing the Damage
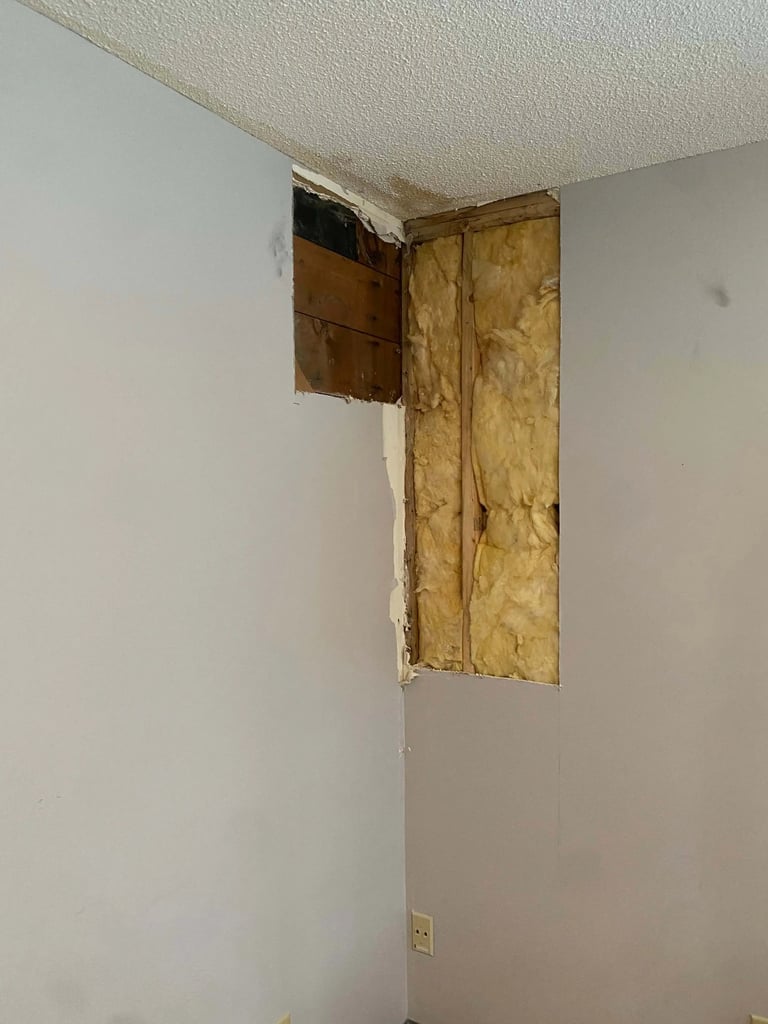
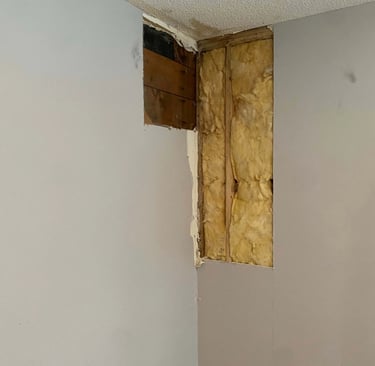
Before diving into repairs, it's important to thoroughly assess the extent of the damage. Start by examining the stained area closely to determine the severity. Look for signs of discoloration, peeling, or bubbling in the texture. Use a flashlight to inspect the ceiling for any hidden damage that may not be immediately visible. This initial assessment will help you understand the scope of the repair work needed.
Next, check for any underlying issues that may have caused the water stain. If the stain resulted from a leaky roof, inspect the attic for any signs of water intrusion. Look for damp insulation, watermarks on rafters, or any visible leaks. If plumbing issues are suspected, examine the pipes and fixtures above the stained ceiling. Addressing the root cause of the water stain is crucial to prevent future damage.
Once you've identified the cause and extent of the damage, create a plan for the repair. Determine whether you'll need to remove a section of the ceiling or if a surface repair will suffice. Take note of the materials and tools required for the job. Creating a detailed plan will help you stay organized and ensure you have everything you need before starting the repair process.
How to Remove and Replace Damaged Sections
Once you've assessed the damage and gathered your materials, it's time to start the repair process. If the water damage is extensive, you may need to remove and replace a section of the ceiling. Begin by marking the damaged area with a pencil or chalk. Use a utility knife to carefully cut along the marked lines, creating a clean, rectangular section to remove. Be cautious not to cut too deeply, as you don't want to damage any underlying structures.
After cutting out the damaged section, use a putty knife to scrape away any loose or peeling texture around the edges. This will help create a smooth surface for the new texture to adhere to. Next, cut a piece of drywall to fit the hole you created. Secure the drywall patch in place using drywall screws and a screwdriver. Ensure the patch is flush with the surrounding ceiling to create a seamless repair.
Once the patch is secured, apply joint compound around the edges using a putty knife. Smooth out the compound to blend it with the existing ceiling. Allow the compound to dry according to the manufacturer's instructions. After it has dried, lightly sand the area with a sanding sponge to create a smooth surface. This will prepare the area for the application of the popcorn texture spray.
Techniques for Reapplying Popcorn Texture
Reapplying the popcorn texture is a critical step in ensuring your repair blends seamlessly with the rest of the ceiling. Start by shaking the can of popcorn texture spray vigorously to ensure the contents are well-mixed. Follow the manufacturer's instructions for proper application. Hold the can approximately 12-18 inches away from the ceiling and spray in a sweeping motion. Apply the texture evenly, taking care not to oversaturate any one area.
It's important to work in small sections to maintain control over the application. If you're new to using texture spray, practice on a piece of cardboard or scrap drywall first to get a feel for the technique. This will help you achieve a more even and consistent application. After spraying the texture, allow it to dry completely according to the manufacturer's instructions. This drying time is crucial for achieving a durable finish.
Once the texture has dried, inspect the area to ensure it matches the surrounding ceiling. If needed, you can lightly sand the texture to blend it further. Be gentle during this process to avoid damaging the new texture. If any areas appear uneven or sparse, apply a second coat of texture spray and allow it to dry. Achieving a seamless blend may require patience and multiple applications, but the end result will be worth the effort.
Painting and Finishing Touches for a Seamless Look
With the texture applied and dried, the next step is painting the repaired area to match the rest of the ceiling. Begin by applying a coat of primer to the textured area. Primer helps the paint adhere better and ensures a uniform finish. Use a paint roller with a thick nap to apply the primer evenly. Allow the primer to dry completely before proceeding to the next step.
Once the primer is dry, it's time to paint the ceiling. Choose a high-quality ceiling paint that matches the existing color. Use the same paint roller to apply the paint in even strokes. It's important to blend the paint well with the surrounding area to avoid visible lines or patches. Depending on the size of the repaired area, you may need to feather the paint outwards to achieve a seamless look.
After the first coat of paint has dried, inspect the area for any inconsistencies. If needed, apply a second coat of paint to ensure full coverage. Allow the paint to dry completely before removing any painter's tape or drop cloths. Finally, step back and admire your work. The repaired area should blend seamlessly with the rest of the ceiling, restoring its original charm.
Preventative Measures to Avoid Future Stains
Preventing future water stains on your popcorn ceiling involves addressing the root causes and taking proactive measures. Regular roof maintenance is essential to prevent leaks. Inspect your roof at least twice a year, especially after severe weather, to identify any potential issues. Look for damaged shingles, loose flashing, or clogged gutters. Addressing these problems promptly can prevent water from seeping into your ceiling.
In addition to roof maintenance, it's important to keep an eye on your plumbing systems. Regularly inspect pipes, especially those running through ceilings, for any signs of leaks or corrosion. If you notice any issues, address them immediately to prevent water damage. Installing water leak detectors in areas prone to leaks, such as bathrooms and kitchens, can provide early warning of potential problems.
Improving ventilation in your home can also help prevent water stains caused by humidity and condensation. Ensure that bathrooms and kitchens have adequate ventilation systems in place. Use exhaust fans during and after showers to reduce moisture buildup. Additionally, consider using dehumidifiers in areas with high humidity levels. Taking these preventative measures will help protect your popcorn ceiling from future water stains and prolong its lifespan.
Conclusion and Final Thoughts on Ceiling Maintenance
Repairing water stains on a popcorn ceiling may seem daunting, but with the right tools and techniques, it can be a manageable DIY project. Understanding the properties and potential issues of popcorn ceilings, as well as the common causes of water stains, is the first step in effectively addressing the problem. Prioritizing safety, especially when dealing with potential asbestos, is crucial for your health and well-being.
By following a step-by-step approach, from assessing the damage to reapplying the texture and painting, you can achieve a seamless repair that restores the ceiling's original charm. Taking preventative measures, such as regular roof and plumbing maintenance, as well as improving ventilation, can help avoid future water stains and prolong the life of your popcorn ceiling.
Regular maintenance and prompt repairs are key to keeping your ceiling in top condition. Whether you're dealing with minor stains or more extensive damage, a methodical approach and attention to detail will yield the best results. With patience and care, you can successfully repair and maintain your popcorn ceiling, ensuring it remains a beautiful feature of your home for years to come.
Home | Contact | Offices | Faq | Service Area | Blog | Drywall Finishing | Drywall Taping | Drywall Repair | Plaster Repair | Ceiling Repair | Wall Repair | Drywall Installation | Drywall Hanging | Popcorn Ceiling Repair | Hole in Ceiling | Fix Hole In The Wall | Interior Painting | Knockdown Texture | Water Damage Repair | Drywall Bathroom | Drywall Ceiling | Soundboard | Drywall Patch | Ice Dam Roof Leak | Drywall over Plaster | Drywall Over Popcorn | Skim Coat Level 5 | Popcorn Texture Removal | Drywall Finish Levels | | Refund Policy | Privacy Policy | Terms and Conditions


600 East Main St Chicopee, MA, 01020
203 Circuit Ave n39, West Springfield, MA 01089

