


Drywall Taper In Western MA
25 Years of Experience Taping Drywall we stand behind our work with a 3 year warrentee
MrWalls Drywall & Painting - Western Massachusetts
Professional Drywall Tapers and Finishers Serving the Pioneer Valley and Beyond
Taping is the craft that determines whether a finished wall reveals its seams or hides them completely. MrWalls provides professional drywall taping and finishing services throughout the Pioneer Valley, on new construction, renovation, and repair projects where the quality of the finished surface matters.
·Springfield · Chicopee · Holyoke · Northampton & Beyond
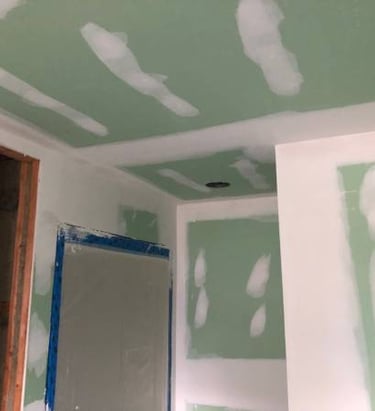
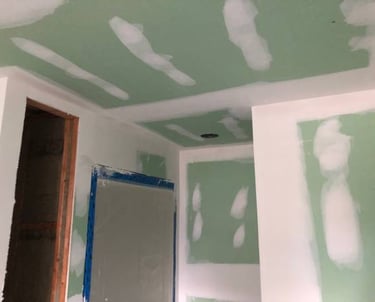
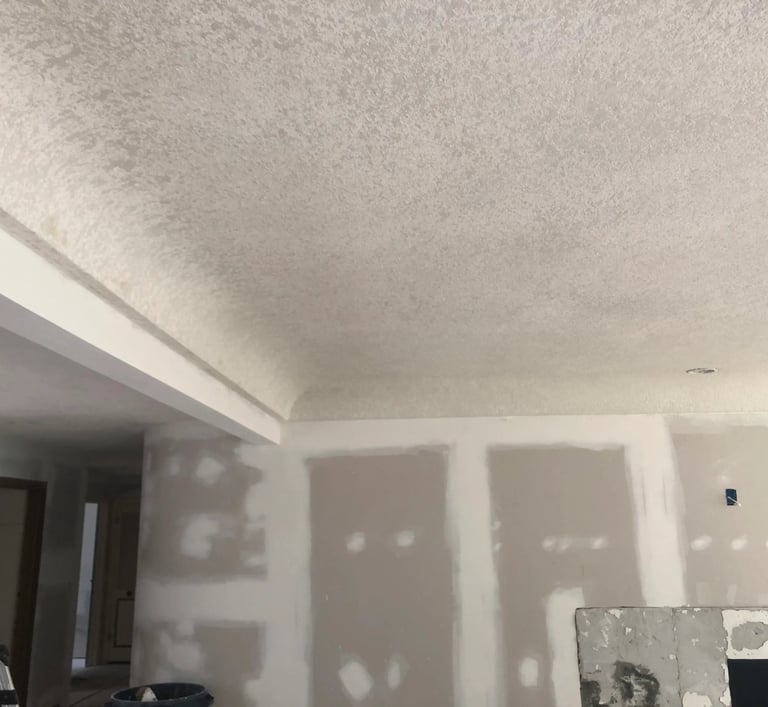
Drywall taping is the finishing discipline that most people never see performed but everyone sees the result of. A skilled taper produces walls where seams disappear completely under paint. A poor one produces walls where every panel location is visible under raking light no matter how many times the room is repainted. MrWalls tapes to the standard that disappears.
In the drywall trade, hanging the boards is considered the straightforward part. Taping is where the skill is. A crew can hang a room in a day. Taping, coating, and finishing that same room to a quality that holds up under paint, under examination, and through a full cycle of Western Massachusetts seasons requires a different order of patience and technique. It is the step that separates drywall work that looks professional from drywall work that looks like drywall work.
MrWalls Drywall and Painting provides professional drywall taping and finishing services throughout Western Massachusetts. We tape new construction for builders and general contractors, finish renovation and repair projects for homeowners, and bring the same standard of seam treatment and feathering to every scope of work regardless of size. If your project requires walls that truly hold up under paint, MrWalls is the taping contractor to call across the Pioneer Valley.
What Drywall Taping Actually Involves
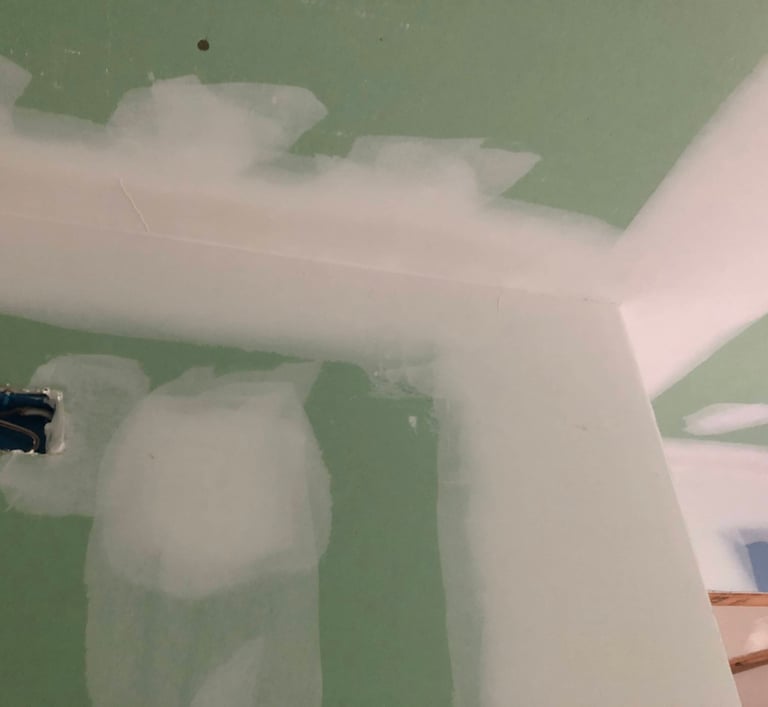
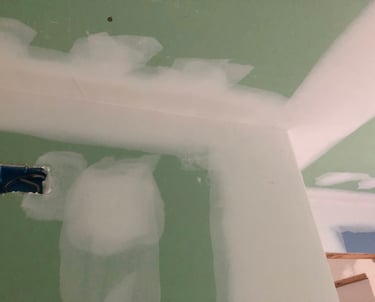
Taping is shorthand for the full finishing sequence that transforms hung drywall panels into a paint-ready surface. It encompasses the tape coat that bonds paper tape to seams, the successive compound coats that build and blend each seam into the wall plane, the treatment of all corners and fastener locations, and the final sanding and inspection that confirms the surface is ready for primer and paint.
The goal of professional drywall taping is a finished surface where no panel seam, fastener location, or corner transition is visible under any normal lighting condition after paint. Achieving that goal requires understanding where light will strike the surface in the finished room, placing seams in locations that minimize their exposure to raking light, applying compound in the correct sequence with the correct timing between coats, and feathering each coat far enough beyond the seam that the transition is completely gradual and imperceptible. This is a precision craft, and MrWalls executes it that way on every project.
The Three Coat System: What Each Coat Does
Professional drywall taping uses a three-coat system, and each coat serves a specific and different purpose. Skipping or combining coats produces a result that looks acceptable until the first raking light or first coat of paint reveals every compromise.
First
Adhesion and Strength
Paper tape is embedded in a thin bed of setting compound over every flat seam. Fastener dimples receive their first fill. Inside corners are hand-taped. This coat is about bond strength, not surface quality.
Fill Coat
Building the Plane
A wider, thinner coat applied over cured tape coat. Begins feathering seams into the wall plane. Covers tape completely and starts the transition that makes seams disappear. Applied wider than the tape coat on every seam.
Final Surface Quality
The thinnest and widest coat. Applied with lightweight compound and feathered as far as possible beyond the fill coat edges. The coat that determines final surface quality and visibility under paint.
MrWalls tip: the most common taping shortcut taken by contractors under schedule pressure is applying the finish coat before the fill coat is fully dry. Compound that is still damp beneath a surface that appears dry will continue to shrink after the finish coat is applied, producing a slight ridge or depression along the seam center that will be visible through paint for the life of the wall. MrWalls allows full dry time between every coat. A wall that is finished one day faster than it should be is a wall that shows seams for twenty years.
Taping Services MrWalls Provides
MrWalls provides drywall taping and finishing services across all residential and commercial project types throughout Western Massachusetts.
🏗️
Full tape and finish on new residential and commercial builds. Working in sync with builder schedules across the Pioneer Valley from first coat through paint-ready inspection.
🏠
Renovation and Repair Finishing
Taping and finishing new drywall installed in renovated rooms, additions, and after repair work, blended invisibly into existing finished surfaces where needed.
✨
Level 5 Skim Coat Finishing
Premium full-surface skim coat applied over taped and finished drywall for satin, semi-gloss, or any high-sheen paint application. Required for gloss paint on any surface.
🏢
Commercial Taping
High-volume taping for office, retail, and multi-unit residential builds. Consistent quality across large square footage jobs delivered on builder timelines.
🔧
Repair and Blend Finishing
Taping and finishing patches and repairs so they blend into the surrounding finished surface. Seam treatments that make a repaired area read as original wall.
🪟
Corner and Bead Work
All outside corners set plumb and straight with appropriate bead and finished to crisp, durable edges. Inside corners hand-taped for flexibility and long-term crack resistance.
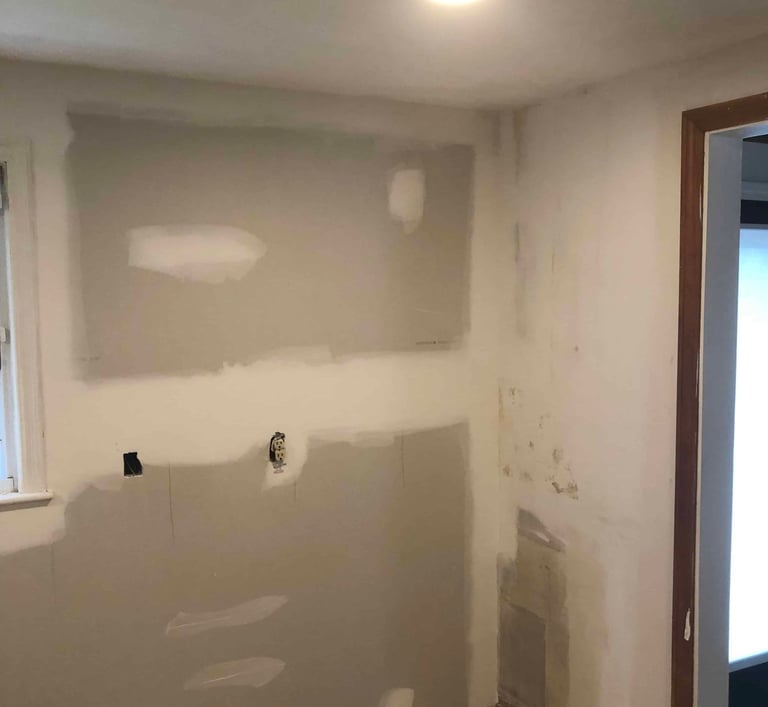
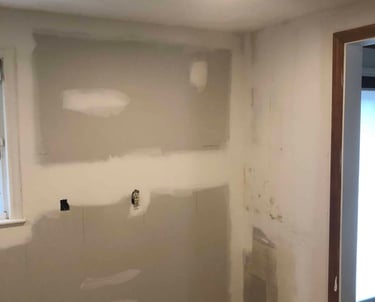
What Makes a Taping Job Fail
Visible seams, cracking at tape lines, nail pops appearing through fresh paint, and ridges along butt joints are the most common complaints homeowners have about drywall finishing quality. Every one of these problems has a specific cause in the taping process, and understanding those causes is how MrWalls avoids them on every project.
Most Common
Seams Visible Under Paint
Caused by insufficient feathering on fill and finish coats. Compound that does not extend far enough beyond the tape line leaves a visible ridge that catches raking light through paint. The solution is wider coats and more patience, not more coats applied narrowly.
Common
Tape Bubbles and Lifting
Paper tape that was not fully embedded in fresh compound during the tape coat will develop air bubbles or lift at the edges once dry. Caused by insufficient compound behind the tape at the time of embedding. Cannot be painted over without re-taping the seam.
Common
Butt Joint Crowning
Butt joints, where two non-tapered panel ends meet, are the hardest seam type to finish invisibly. They require wide, very thin feathering over a greater distance than tapered seams. Under-feathered butt joints crown slightly and show as a hump across the wall plane.
Common
Fasteners that were set too deep during hanging, or that loosen due to framing shrinkage drying, appear as round bumps through paint. Correctly set fasteners at the tape coat stage do not pop. Over-driven fasteners cannot be reliably covered with compound and will re-appear.
Common
Corner Cracking
Outside corners with metal bead that was not set plumb will crack at the compound edge as the building moves seasonally. Inside corners that were taped with insufficient compound will open along the tape line through the first winter cycle.
Occasional
Photographing Through Paint
On surfaces with satin or semi-gloss paint, the porosity difference between compound areas and face paper areas causes paint to absorb differently and appear as dull spots at every seam and fastener location. Prevented by Level 5 skim coat before high-sheen paint.
Taping in Western Massachusetts: Why Climate Matters
Western Massachusetts has one of the most demanding climates in New England for drywall taping. Cold, dry winters and hot, humid summers create conditions that affect compound drying time, shrinkage behavior, and the seasonal movement of framing members that put stress on finished seams. A taping job done correctly for a stable, climate-controlled environment may perform poorly in a Pioneer Valley home where the framing cycles through significant moisture content changes between seasons.
MrWalls does not tape in buildings that are not enclosed in the winter, heated to a consistent minimum temperature, and protected from outdoor humidity extremes. Compound applied in cold conditions dries too slowly, sets improperly, and is prone to excessive shrinkage once the building warms. Compound applied in very high humidity absorbs moisture from the air and extends cure times unpredictably. Western Massachusetts winters in particular require active heating of the work area throughout the taping and curing phases, and MrWalls requires that condition to be in place before any taping work begins.
The seasonal movement of wood framing in Pioneer Valley homes is also a factor in long-term seam performance. Framing that absorbs moisture in summer and releases it in winter moves enough to stress seams at certain locations, particularly butt joints and seams on exterior wall surfaces. MrWalls uses setting-type compound for the tape coat on butt joints and high-stress seam locations because it is more resistant to movement-induced cracking than drying-type compound once fully cured.
The MrWalls Taping Process
Every taping and finishing project MrWalls performs follows the same disciplined sequence. Here is exactly how we work from the first coat of compound through the paint-ready finish.
Pre-tape inspection of the hanging work. Before any compound is mixed, we inspect the hung drywall for fastener depth, seam fit, gaps at panel edges, and any out-of-plane framing that will telegraph through the finish. Problems found at this stage take minutes to correct. The same problems found after the finish coat is sanded take days.
Corner bead installation. All outside corners receive metal or vinyl bead set plumb and straight with the appropriate fastener pattern. Corner bead is the geometric framework of the room. A bead that is not plumb produces a corner that reads as crooked regardless of how well the compound is applied over it.
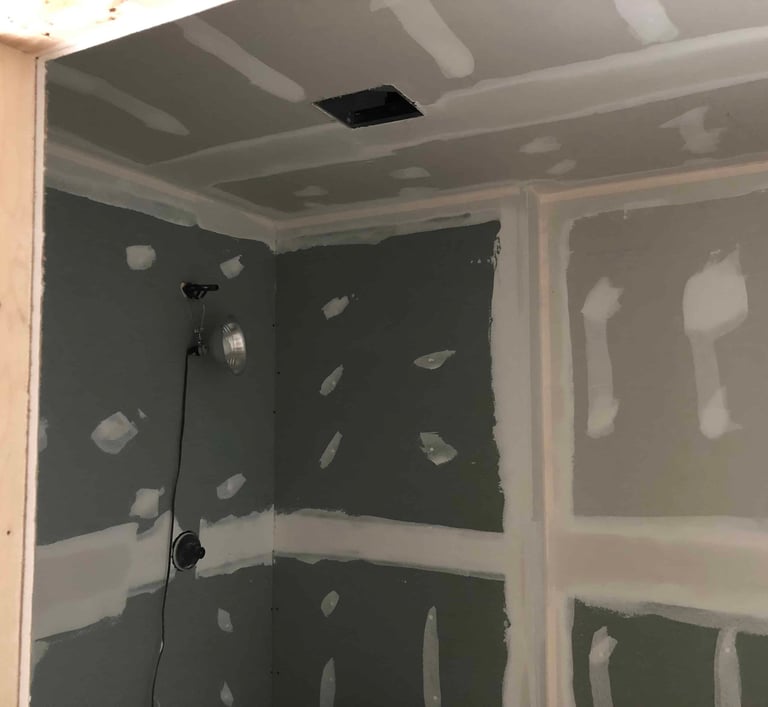
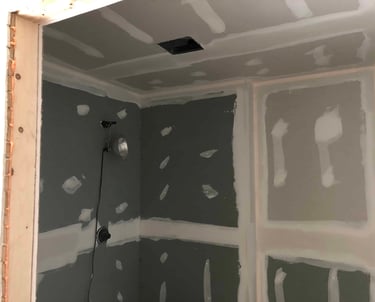
Tape coat on flat seams. A thin, even bed of setting compound is applied to each flat seam and paper tape is pressed immediately into the wet compound, smoothed flat with no air behind it, and lightly skimmed over to embed fully. The tape coat is applied to all seams in a section before any drying begins to maintain consistent material consistency throughout.
Inside corner taping. Inside corners receive paper tape folded and pressed into fresh compound, smoothed on both sides, and skimmed to a clean line. Inside corners are the most movement-sensitive location in any taped room. MrWalls hand-tapes all inside corners rather than using pre-formed corner tape, because hand-taped paper corners flex with building movement without opening at the seam.
First fastener fill on all nail and screw dimples. Every fastener location receives its first coat of compound during the tape coat phase, applied flush and slightly proud to allow for shrinkage. Fastener treatment is completed in the same pass as the seam taping so the schedule stays organized and all first-coat work cures at the same rate.
Full dry time before fill coat. The tape coat is allowed to dry completely before any fill coat is applied. In winter conditions in Western Massachusetts buildings, this means ensuring the space is heated adequately and allowing additional time if needed. The fill coat applied over a damp tape coat is the most reliable way to create a seam ridge that will never fully disappear.
Fill coat on seams, corners, and fasteners. The fill coat is applied wider than the tape coat on every seam, feathering out well beyond the tape edges to begin building the gradual transition. Corner bead flanges are filled and feathered on both adjacent wall surfaces. Fastener locations receive their second fill. The fill coat begins to establish the flat plane that will be the finished surface.
Full dry time before finish coat. The fill coat receives the same respect for dry time as the tape coat. MrWalls does not apply finish coat compound over fill coat that is still damp at any depth. On large projects, this often means rotating through rooms on a schedule that allows each room adequate cure time while keeping the overall project moving efficiently.
Finish coat application. Lightweight finishing compound is applied in the thinnest, widest passes of the entire process. The finish coat extends beyond the fill coat edges on every seam, feathering as gradually as possible into the flat board surface on both sides. Butt joints receive additional width because their inherent geometry makes them harder to feather invisibly than tapered seams.
Sanding. Fully cured finish compound is sanded with a fine-grit pole sander on large flat areas and by hand in corners, reveals, and detail areas. Sanding is performed dry and under controlled conditions to prevent compound from re-softening. Dust collection is managed throughout to maintain site cleanliness.
Raking light inspection. Every wall and ceiling surface is inspected under a work light held low and parallel to the surface before any primer is applied. This is the same condition that will reveal any seam, fastener, or surface irregularity after paint is on the wall. All issues identified at this stage are corrected before the surface is considered complete.
Paint-ready turnover or Level 5 skim coat. For standard Level 4 finish, the inspected surface is left clean and ready for primer and paint. For rooms specified at Level 5, a full skim coat of finishing compound is applied over the entire surface, sanded, and re-inspected before primer. MrWalls can complete the priming and painting as well, taking the wall from bare drywall through finished painted surface in one project engagement.
Taping for New Construction vs. Renovation and Repair
New construction taping and renovation taping require the same technical skills but present different practical challenges. In new construction, every surface is fresh, framing is consistent, and the goal is producing a uniform quality finish across the entire job, while keeping pace with the overall build schedule. The emphasis is on consistent production and a schedule discipline.
Renovation and repair taping requires an additional skill: blending. New drywall must be taped and finished so its seams blend invisibly into the surrounding original finished surface. This requires reading the existing finish level, matching compound selection and feathering to what is already there, and in many cases applying the new finish coats in a way that extends beyond the new drywall boundary into the existing wall surface to create a gradual rather than abrupt transition. MrWalls performs both types of taping work and understands the different demands each one places on the finishing process.
On renovation projects in older Pioneer Valley homes, the existing wall surface has often been painted many times over decades and carries a surface texture from all those paint layers that new compound does not. Matching the finish of a room that has been painted eight times over sixty years requires attention to surface character, not just seam placement and feathering width. MrWalls addresses this by applying the finish coat in a way that incorporates some of the surface character of the surrounding original wall into the new work, producing a blend that reads as continuous rather than as new work adjacent to old.
Why MrWalls for Drywall Taping in Western Massachusetts
MrWalls Drywall and Painting has taped and finished walls in new construction, renovation, and repair projects across Springfield, Chicopee, Holyoke, Westfield, Northampton, Easthampton, Agawam, Ludlow, Wilbraham, Longmeadow, East Longmeadow, and throughout the Pioneer Valley. We understand the schedule requirements of builders, the quality expectations of homeowners, and the specific challenges that Western Massachusetts climate conditions place on compound cure and seam performance.
Three-coat system applied correctly, with full dry time respected between every coat and no shortcuts taken to compress the schedule at the expense of seam quality.
Raking light inspection standard applied before any project is called complete, the same condition under which paint will reveal any remaining seam or surface issue.
Climate-aware practice, MrWalls requires enclosed, heated, and appropriately conditioned spaces before taping begins, protecting the investment in every Pioneer Valley project through the first and every subsequent seasonal cycle.
New construction and renovation capability, schedule-focused on builds and blend-focused on renovation work, with the technique appropriate to each project type.
Full drywall and painting services, one contractor provides hanging, taping, finishing, and painting so the wall system is managed from bare framing through finished painted surface without gaps between trades.
Licensed, insured, and locally owned, a Pioneer Valley contractor with a reputation built on finished walls that hold up under inspection and over time.
Frequently Asked Questions
How long does drywall taping and finishing take?
A typical residential room requires three to four days from first coat through sanded and paint-ready finish, accounting for mandatory dry time between coats. A full-house new construction project or whole-floor renovation is typically scheduled over one to two weeks depending on square footage and room count. MrWalls provides a detailed schedule during the project planning phase and communicates promptly if any condition, such as inadequate heating or unexpected framing issues discovered at hanging inspection, requires an adjustment.
What is the difference between Level 4 and Level 5 finish?
Level 4 is the standard residential three-coat finish. All seams and fasteners are taped and finished with a smooth, paint-ready surface appropriate for flat, matte, or eggshell paint. Level 5 adds a full skim coat of finishing compound applied over the entire surface after the three-coat system is complete, eliminating the porosity difference between compound areas and face paper. Level 5 is required for satin, semi-gloss, or gloss paint on any surface, and for any high-end interior finish where sheen consistency across the entire wall is expected.
My walls have visible seams from previous taping work. Can they be fixed without replacing the drywall?
In most cases yes. Visible seams from previous taping work are typically a feathering problem rather than a structural one. The tape is sound and the drywall does not need to be replaced. The seam location is sanded to remove any existing ridges, additional compound is applied and feathered much wider than the original application, and the surface is re-finished. On smooth walls, a full skim coat over the affected wall or room produces the most consistent result. MrWalls assesses the specific seam condition during the estimate walkthrough and recommends the most effective correction approach.
I am a builder looking for a taping subcontractor. Does MrWalls work with general contractors?
Yes. MrWalls works directly with general contractors and custom home builders throughout Western Massachusetts on new construction and renovation projects. We are familiar with builder schedules, sequencing requirements, and the inspection standards applied at rough and finish stages. We communicate proactively about schedule and scope, and we deliver work that reflects well on the general contractor's project. If you are a builder looking to establish a reliable taping sub relationship in the Pioneer Valley, we welcome the conversation.
Can MrWalls also hang the drywall before taping?
Yes. MrWalls provides full drywall services including hanging, taping, finishing, and painting. Completing the full scope through a single contractor eliminates the coordination gap between the hanging and taping phases, ensures the hanging work meets the quality standard required for the finishing level specified, and simplifies the project schedule for both homeowners and general contractors. MrWalls can be engaged from the framing inspection phase through the final painted surface in a single project engagement.
Serving Western Massachusetts Communities
MrWalls provides drywall taping and finishing services throughout Western Massachusetts, including Springfield, Chicopee, Holyoke, Westfield, Northampton, Easthampton, Agawam, Ludlow, Wilbraham, East Longmeadow, Longmeadow, South Hadley, Amherst, Belchertown, Palmer, Ware, and surrounding communities across Hampden and Hampshire Counties. Whether you are a builder needing a reliable taping sub on a new construction schedule or a homeowner needing a renovation finished to a standard your painter will thank you for, MrWalls delivers.
Contact MrWalls Drywall & Painting
Need a Professional Drywall Taper in Western Massachusetts?
MrWalls tapes and finishes drywall to the standard that holds up under paint, under raking light, and through every Pioneer Valley season.
Call or email us today: (413) 302-0640 · Service@MrWalls.Net
Request a Free Estimate ↗
Contact us for Drywall Taping
Text, Call or fill out this form and we will get back to you
FAQs
1) How long does drywall finishing take?
Most rooms take several days due to drying time between coats. We provide realistic timelines up front.
2) Do you handle small repairs?
Yes. We fix nail pops, cracks, and damaged sections and blend them with existing surfaces.
3) Can you work around occupied spaces?
Yes. We plan dust control and daily cleanup to keep homes and offices usable.
4) Are you insured?
Yes. Our work is fully insured for residential and commercial projects.
5) Do you serve areas outside Chicopee?
We serve many towns across Western Massachusetts, including Springfield, Holyoke, and Westfield.
6) How do I get an estimate?
Contact us by phone or email, and we’ll schedule a local visit to review the scope.
”Very Dependable and fair.”
- Mary from Holyoke MA


”Reasonable price, Excellent experience! I was in a bind and was on a time constraint, and Jason was extremely accommodating and sensitive to my dilemma! The job turned out great! Thank you, Jason!”
- Dianna from Agawam MA
”Great Job, reliable and trustworthy. He comes when he says he will”
- Maureen from Springfield MA
”Jason was friendly and on time. He did a nice job. He was trustworthy in our home. His prices were very reasonable. We are recommend him greatly”
- Susan from Longmeadow MA
Drywall Repair Customer Reviews From Massachusetts


Home | Contact | Offices | Faq | Service Area | Blog | Drywall Finishing | Drywall Taping | Drywall Repair | Plaster Repair | Ceiling Repair | Wall Repair | Drywall Installation | Drywall Hanging | Popcorn Ceiling Repair | Hole in Ceiling | Fix Hole In The Wall | Interior Painting | Knockdown Texture | Water Damage Repair | Drywall Bathroom | Drywall Ceiling | Soundboard | Drywall Patch | Ice Dam Roof Leak | Drywall over Plaster | Drywall Over Popcorn | Skim Coat Level 5 | Popcorn Texture Removal | Drywall Finish Levels | | Refund Policy | Privacy Policy | Terms and Conditions


600 East Main St Chicopee, MA, 01020
203 Circuit Ave n39, West Springfield, MA 01089

