
Should You Install Sheetrock Ceilings or Walls First?
Deciding whether to install Sheetrock ceilings or walls first can impact your project’s efficiency. Installing sheetrock in the wrong order can also create gaps in the ceiling corners. By hanging drywall in the right order, you will get a more professional installation.
SHEETROCKCOMMON QUESTIONS
Should You Install Sheetrock Ceilings or Walls First?
Deciding whether to install Sheetrock ceilings or walls first can impact your project’s efficiency. Installing sheetrock in the wrong order can also create gaps in the ceiling corners. By hanging drywall in the right order, you will get a more professional installation.
Understanding Sheetrock: What Is It?
Sheetrock, also commonly referred to as drywall, is a construction material used to create walls and ceilings. It is made of gypsum plaster sandwiched between two thick sheets of paper. This material is widely preferred in construction due to its versatility, ease of installation, and cost-effectiveness. Unlike traditional plaster, which can be labor-intensive and time-consuming to apply, Sheetrock offers a quicker, more efficient solution for creating smooth, finished surfaces in buildings.
The gypsum core in Sheetrock is fire-resistant, which adds an extra layer of safety to homes and buildings. Additionally, it provides sound insulation, making it ideal for interior walls and ceilings. Sheetrock comes in various thicknesses and sizes, allowing for customization based on the specific needs of a project. Specialized types, such as moisture-resistant or mold-resistant drywall, are also available, providing even more options for different environments and applications.
Understanding the properties of Sheetrock is crucial for making informed decisions during installation. Knowing its benefits and limitations can help you plan your project more effectively, ensuring a successful outcome. Whether you're a DIY enthusiast or a professional contractor, a solid grasp of what Sheetrock is and how it works will set the foundation for a smooth installation process.
The Importance of Proper Installation
Proper installation of Sheetrock is essential for achieving a professional-looking finish that will stand the test of time. Installing drywall correctly not only enhances the aesthetic appeal of a room but also ensures structural integrity. Poor installation can lead to issues such as cracks, uneven surfaces, and even compromised safety. Therefore, understanding the right techniques and order of installation is crucial.
One of the primary reasons for emphasizing proper installation is to avoid gaps and misalignments. When Sheetrock is installed incorrectly, it can create gaps between sheets, particularly at the ceiling and wall junctions. These gaps can be difficult to conceal and may require additional work to fix, leading to increased costs and wasted time. Ensuring that the drywall is hung in the correct order minimizes these issues and results in a cleaner, more polished look.
Moreover, proper installation impacts the durability and longevity of the drywall. Correctly installed Sheetrock is less likely to suffer from common issues such as sagging, warping, or moisture damage. This is particularly important in high-humidity areas where moisture-resistant drywall may be used. By following the correct installation procedures, you can ensure that your walls and ceilings remain in good condition for years to come, reducing the need for repairs and maintenance.
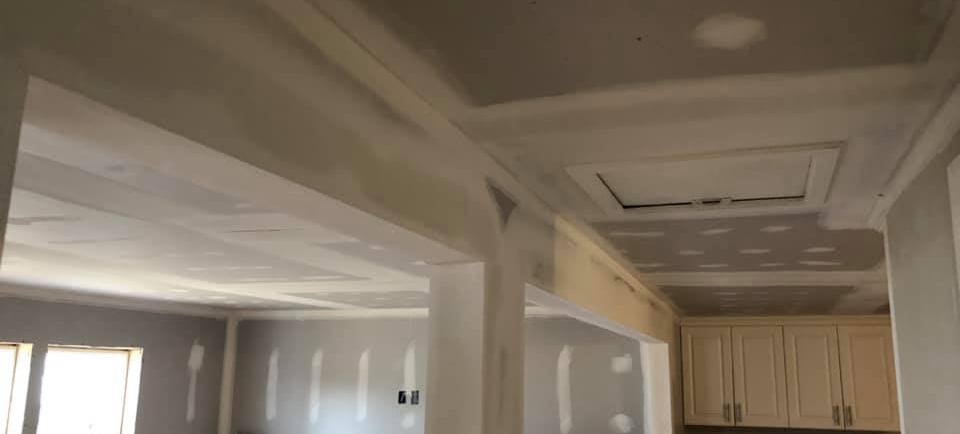
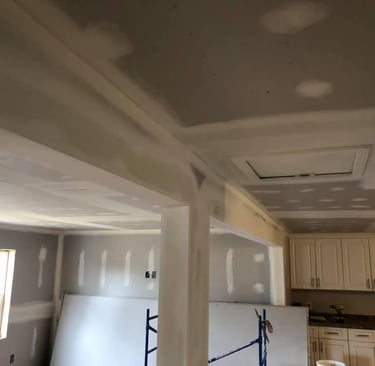
Ceiling Installation: Why It’s Often Done First
When it comes to installing Sheetrock, starting with the ceiling is generally recommended. There are several reasons why this approach is often preferred, and understanding these can help you make an informed decision for your project. One of the primary reasons is that installing the ceiling first provides a stable base for the walls. By securing the ceiling panels in place first, you create a surface that the wall panels can rest against, ensuring a snug and secure fit.
Another advantage of installing the ceiling first is that it minimizes the risk of gaps and misalignments at the ceiling-wall junction. When the ceiling is installed first, the wall panels can be cut to fit snugly against it, creating a seamless transition. This not only improves the overall appearance of the room but also reduces the need for extensive taping and mudding to conceal gaps. Additionally, starting with the ceiling makes it easier to handle the more challenging aspects of drywall installation, as working on the ceiling typically requires more effort and precision.
Furthermore, installing the ceiling first can simplify the logistics of the project. By starting at the top, you avoid the risk of damaging newly installed wall panels while working on the ceiling. This is particularly important in rooms with limited space, where maneuvering ladders and tools can be challenging. By tackling the ceiling first, you can ensure that the most physically demanding part of the installation is completed before moving on to the walls, resulting in a more efficient workflow.
Wall Installation: Advantages of Doing It Second
Once the ceiling has been installed, the next step is to move on to the walls. Installing the walls second has several advantages that can contribute to a more efficient and professional-looking project. One of the key benefits is that it allows for better alignment and fitting of the wall panels. Since the ceiling panels are already in place, you can measure and cut the wall panels to fit precisely against the ceiling, ensuring a tight and seamless fit.
Another advantage of installing the walls second is that it simplifies the taping and mudding process. With the ceiling panels already in place, you can focus on creating smooth transitions between the wall panels and the ceiling. This can significantly reduce the amount of time and effort required for finishing, as there are fewer gaps and misalignments to address. Additionally, installing the walls second allows you to work more efficiently, as you can use the ceiling panels as a reference point for positioning the wall panels.
Furthermore, installing the walls second can enhance the overall structural integrity of the room. By securing the wall panels to both the ceiling and the floor, you create a more stable and rigid structure. This is particularly important in areas prone to movement or shifting, such as in regions with seismic activity. By following the proper installation order, you can ensure that your walls and ceilings are securely fastened and less likely to suffer from issues such as cracking or warping over time.
Common Mistakes in Sheetrock Installation
Despite its relative ease of use, installing Sheetrock can be fraught with potential pitfalls. One of the most common mistakes is failing to properly measure and cut the panels. Accurate measurements are crucial for ensuring a snug fit, and even small errors can result in gaps and misalignments. Taking the time to double-check your measurements and making precise cuts can help avoid these issues and ensure a professional-looking finish.
Another common mistake is not securing the panels properly. Sheetrock must be securely fastened to the framing using screws or nails, and failing to do so can result in sagging or loose panels. It's important to use the right type of fasteners and to space them appropriately to ensure a secure fit. Additionally, overdriving screws or nails can damage the drywall, weakening its structural integrity and making it more prone to cracking.
Improper taping and mudding is another frequent mistake in Sheetrock installation. Applying too much or too little joint compound can lead to uneven surfaces and visible seams. It's important to use the right amount of compound and to apply it evenly for a smooth finish. Additionally, failing to properly sand the joints can result in rough, uneven surfaces that are difficult to paint or finish. Taking the time to properly tape, mud, and sand the joints can make a significant difference in the final appearance of your walls and ceilings.
Tools and Materials Needed for Installation
Installing Sheetrock requires a variety of tools and materials to ensure a successful and efficient project. One of the most important tools is a utility knife, which is used for cutting the drywall panels to size. A straight edge or T-square is also essential for making precise cuts. Additionally, a drywall saw can be useful for cutting openings for electrical outlets, light fixtures, and other features.
Another essential tool is a drywall lift, which can make the process of installing ceiling panels much easier. This device allows you to lift and hold the panels in place while you secure them to the framing. For wall panels, a drywall T-square can help ensure that the panels are properly aligned and level. A tape measure is also important for taking accurate measurements, and a chalk line can be useful for marking straight lines on the panels.
In addition to tools, you'll need a variety of materials for the installation process. Drywall screws or nails are used to secure the panels to the framing, and joint tape and joint compound are used to cover the seams between panels. Sandpaper or a sanding block is also necessary for smoothing the joint compound after it has dried. Finally, primer and paint or wallpaper can be used to finish the walls and ceilings after the installation is complete.
Step-by-Step Guide to Installing Sheetrock Ceilings
Installing Sheetrock ceilings can be a challenging task, but with the right approach and tools, it can be done efficiently and effectively. The first step is to prepare the room by removing any existing ceiling fixtures and covering the floor and furniture with drop cloths to protect them from dust and debris. Next, measure the ceiling and cut the drywall panels to size, taking care to account for any openings for light fixtures or vents.
Once the panels are cut, use a drywall lift to position the first panel against the ceiling. Secure the panel to the ceiling joists using drywall screws or nails, spacing them approximately 12 inches apart. Be sure to use enough fasteners to securely hold the panel in place, but avoid overdriving them, as this can damage the drywall. Repeat this process for each panel, working your way across the ceiling.
After all the panels are in place, the next step is to tape and mud the seams. Apply joint tape over the seams between panels, pressing it firmly into the joint compound to ensure a smooth finish. Then, apply a thin layer of joint compound over the tape, feathering the edges to blend it with the surrounding drywall. Allow the compound to dry, then sand it smooth before applying additional coats as needed. Finally, prime and paint the ceiling to complete the installation.
Step-by-Step Guide to Installing Sheetrock Walls
Installing Sheetrock walls follows a similar process to installing ceilings, but with a few key differences. Begin by preparing the room, removing any baseboards or trim and covering the floor and furniture with drop cloths. Measure the walls and cut the drywall panels to size, taking care to account for any openings for electrical outlets, windows, or doors. It's important to cut the panels accurately to ensure a snug fit.
Starting at one corner of the room, position the first panel against the wall and secure it to the studs using drywall screws or nails. Space the fasteners approximately 12 inches apart along the edges of the panel and 16 inches apart in the field. Be sure to drive the fasteners just below the surface of the drywall without breaking the paper. Continue this process for each panel, working your way around the room and making sure to align the edges of the panels with the studs.
Once all the panels are in place, tape and mud the seams using joint tape and joint compound. Apply the tape over the seams, pressing it firmly into the compound to ensure a smooth finish. Then, apply a thin layer of joint compound over the tape, feathering the edges to blend it with the surrounding drywall. Allow the compound to dry, then sand it smooth before applying additional coats as needed. Finally, prime and paint the walls to complete the installation.
Tips for a Smooth and Efficient Installation Process
Achieving a smooth and efficient Sheetrock installation requires careful planning and attention to detail. One of the most important tips is to take your time and avoid rushing the process. Properly measuring and cutting the panels, securing them to the framing, and taping and mudding the seams all require precision and patience. Rushing through these steps can lead to mistakes and a less professional-looking finish.
Another tip is to use the right tools and materials for the job. Investing in high-quality tools, such as a drywall lift and a T-square, can make the installation process much easier and more efficient. Additionally, using the right type of drywall for your project, such as moisture-resistant drywall for bathrooms or fire-resistant drywall for kitchens, can help ensure a durable and long-lasting finish.
Finally, take the time to properly prepare the room before starting the installation. Covering the floor and furniture with drop cloths, removing any existing fixtures, and ensuring that the framing is properly aligned and free of obstructions can help prevent delays and make the installation process go more smoothly. By following these tips and taking a methodical approach, you can achieve a professional-looking Sheetrock installation that will stand the test of time.
Conclusion: Making the Right Choice for installation logistic Project
In conclusion, deciding whether to install Sheetrock ceilings or walls first can have a significant impact on the efficiency and quality of your project. Starting with the ceiling provides a stable base for the walls, minimizes the risk of gaps and misalignments, and simplifies the logistics of the installation process. Installing the walls second allows for better alignment and fitting, simplifies the taping and mudding process, and enhances the overall structural integrity of the room.
By understanding the common mistakes in Sheetrock installation and taking the time to properly measure, cut, and secure the panels, you can achieve a professional-looking finish that will stand the test of time. Using the right tools and materials and following a step-by-step approach can help ensure a successful and efficient installation. Whether you're a DIY enthusiast or a professional contractor, taking a methodical approach to your Sheetrock installation can help ensure a smooth and successful project.
Ultimately, making the right choice for your project comes down to careful planning and attention to detail. By understanding the benefits of installing the ceiling first and the advantages of doing the walls second, you can make an informed decision that will result in a professional-looking finish. With the right approach, tools, and materials, you can achieve a durable and long-lasting Sheetrock installation that enhances the beauty and functionality of your home or building.
Home | Contact | Offices | Faq | Service Area | Blog | Drywall Finishing | Drywall Taping | Drywall Repair | Plaster Repair | Ceiling Repair | Wall Repair | Drywall Installation | Drywall Hanging | Popcorn Ceiling Repair | Hole in Ceiling | Fix Hole In The Wall | Interior Painting | Knockdown Texture | Water Damage Repair | Drywall Bathroom | Drywall Ceiling | Soundboard | Drywall Patch | Ice Dam Roof Leak | Drywall over Plaster | Drywall Over Popcorn | Skim Coat Level 5 | Popcorn Texture Removal | Drywall Finish Levels | | Refund Policy | Privacy Policy | Terms and Conditions


600 East Main St Chicopee, MA, 01020
203 Circuit Ave n39, West Springfield, MA 01089

