
Step-by-Step Guide to Repairing Your Sheetrock Ceiling
Transform your living space by learning how to repair your Sheetrock ceiling. This step-by-step guide will help you restore beauty and functionality easily.
SHEETROCKCEILING REPAIR
Step-by-Step Guide to Repairing Your Sheetrock Ceiling
Transform your living space by learning how to repair your Sheetrock ceiling. This step-by-step guide will help you restore beauty and functionality easily.
Understanding Sheetrock and Its Common Issues
Sheetrock, commonly known as drywall, is a prevalent material used in modern construction for interior walls and ceilings. It's composed of a gypsum core sandwiched between two sheets of durable paper. This combination provides a smooth finish that's easy to paint and decorate, making it a popular choice for homeowners and builders alike. However, its popularity also means it's prone to common issues that can compromise its appearance and functionality.
One of the most frequent problems with Sheetrock ceilings is water damage. Leaks from plumbing systems, roof issues, or even high humidity levels can cause the gypsum to absorb moisture, leading to stains, sagging, and eventual disintegration. Additionally, accidental impacts, such as a misthrown ball or a piece of furniture hitting the ceiling, can create unsightly dents and holes. These damages not only ruin the aesthetics of your space but can also pose structural concerns if left unattended.
Another common issue is cracking, often resulting from the natural settling of your home. As buildings age and shift, the Sheetrock can develop hairline fractures or more significant cracks, especially along seams and corners. These cracks can worsen over time, making early intervention crucial. Understanding these common issues is the first step in effectively repairing and maintaining your Sheetrock ceiling. With the right knowledge and tools, you can address these problems efficiently, restoring the beauty and integrity of your living space.
Tools and Materials Needed for Repair
Embarking on a Sheetrock ceiling repair project requires the right set of tools and materials to ensure a professional finish. Firstly, you'll need a utility knife, which is essential for cutting out damaged areas and shaping new pieces of drywall. A drywall saw can also be handy for more extensive cuts. For precise measurements, a tape measure and a carpenter's square are indispensable, helping you achieve clean, straight lines.
When it comes to the materials, you'll need replacement Sheetrock that matches the thickness of your existing ceiling. Drywall screws or nails will secure the new pieces in place. Joint compound, often referred to as mud, is crucial for filling gaps and smoothing surfaces. To apply this compound, a variety of taping knives ranging from 4 to 12 inches will be necessary. Additionally, drywall tape, either paper or mesh, is used to cover seams and ensure a seamless finish.
Other essential items include sandpaper or a sanding block for smoothing the dried compound, a dust mask to protect your lungs from fine particles, and safety glasses to shield your eyes. Drop cloths or plastic sheeting will help protect your floors and furniture from dust and debris. Lastly, if your ceiling has a textured finish, you'll need the appropriate tools and materials to match it, such as a texture sprayer or a brush. Having these tools and materials on hand before you start will make the repair process smoother and more efficient.
Safety Precautions Before Starting the Repair
Before diving into your Sheetrock ceiling repair project, it's crucial to prioritize safety. Working with drywall can generate a significant amount of dust, which can irritate your respiratory system. Therefore, wearing a dust mask is essential to protect your lungs. Additionally, safety glasses will shield your eyes from dust and debris, especially when cutting or sanding drywall. If you're using any power tools, hearing protection like earplugs or earmuffs can help prevent hearing damage from prolonged exposure to loud noises.
Another important safety consideration is the use of ladders or scaffolding. Ensure that any ladder you use is stable and positioned on a flat, even surface. If you're working on a larger area or at a significant height, scaffolding might be a safer option. Always follow the manufacturer’s guidelines for ladder and scaffolding use, and never overreach; it's better to move the ladder or scaffolding than risk a fall.
Before starting the repair, it's also wise to turn off the power to the room at the circuit breaker. This precaution is especially important if you're working near light fixtures or electrical outlets. Accidental contact with live wires can result in serious injury or even death. Ensuring that the work area is well-lit and free of tripping hazards will further enhance your safety. By taking these precautions, you can minimize risks and focus on completing your repair project efficiently and safely.
Assessing the Damage to Your Ceiling
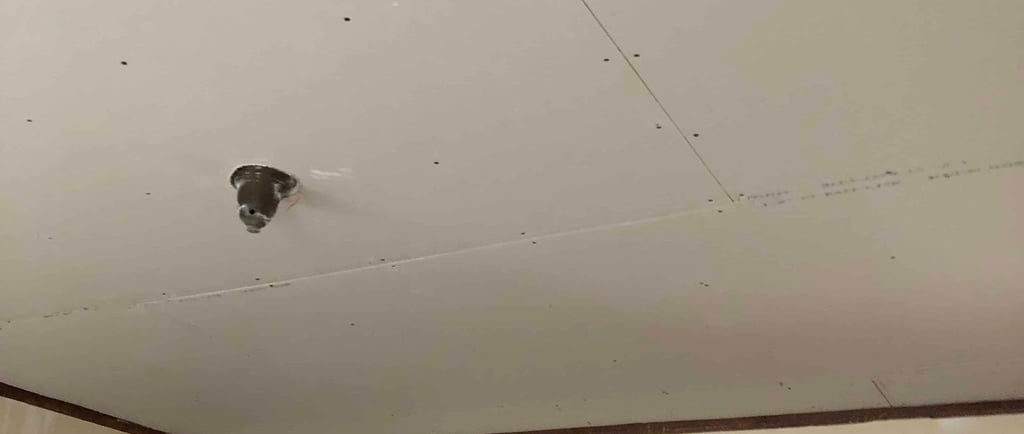
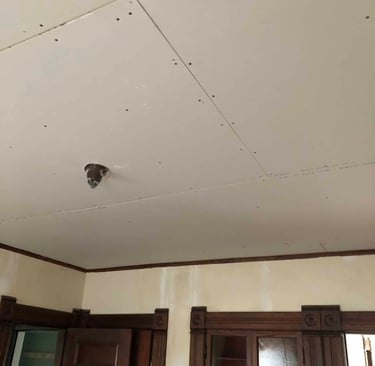
The first step in repairing your Sheetrock ceiling is to thoroughly assess the damage. Identifying the extent and type of damage will help you determine the most effective repair approach. Begin by examining the affected area closely. Look for signs of water damage, such as discoloration, sagging, or soft spots. Water stains often appear as yellow or brown patches, indicating a leak that needs to be addressed before any repair work can be done.
Next, check for any cracks or holes. Hairline fractures may seem minor, but they can expand over time if not properly repaired. Larger cracks, especially those along seams or corners, may indicate structural movement or settling. Additionally, assess any dents or punctures caused by physical impacts. These can vary in size and may require different repair techniques depending on their severity.
If the damage is extensive, covering a large area of the ceiling, you may need to consider replacing entire sections of Sheetrock rather than patching individual spots. This approach can ensure a more uniform and durable finish. For smaller, isolated damages, patching and refinishing may suffice. By accurately assessing the damage, you can plan your repair process more effectively, ensuring that you address all issues and restore your ceiling to its original condition.
Preparing the Area for Repair
Proper preparation of the area is crucial for a successful Sheetrock ceiling repair. Begin by clearing the room of any furniture or decor that could obstruct your work or be damaged by dust and debris. If moving large items isn't feasible, cover them with drop cloths or plastic sheeting to protect them. Ensure that the floor is also covered to catch any falling debris and make cleanup easier.
Next, gather all your tools and materials so that everything you need is within easy reach. This includes your utility knife, drywall saw, replacement Sheetrock, drywall screws or nails, joint compound, taping knives, drywall tape, sandpaper, and any texturing tools. Having a well-organized workspace will streamline the repair process and minimize interruptions.
Before you start cutting or sanding, take a moment to locate any electrical wiring or plumbing that might be behind the damaged area. Use a stud finder or a similar tool to identify these elements and avoid accidentally cutting into them. If you're unsure about the location of electrical components, consider consulting a professional. Once the area is prepped and all safety precautions are in place, you're ready to begin the repair process. Proper preparation ensures a smoother workflow and reduces the risk of complications during the repair.
Step-by-Step Repair Process
The repair process for a Sheetrock ceiling involves several steps, each requiring careful attention to detail. Start by cutting out the damaged section of the ceiling. Use a utility knife or drywall saw to create clean, straight edges around the damaged area. If the damage is extensive, you may need to remove an entire section of Sheetrock, making sure to cut along the studs for a secure fit.
Next, measure the opening and cut a new piece of Sheetrock to fit the space. Dry fit the new piece to ensure it fits snugly. Once you're satisfied with the fit, attach the new Sheetrock to the ceiling joists using drywall screws or nails. Be sure to countersink the screws slightly below the surface of the drywall to allow for a smooth finish.
After securing the new piece, it's time to tape the seams. Apply drywall tape over the seams where the new Sheetrock meets the existing ceiling. This step is crucial for creating a seamless appearance. Once the tape is in place, apply a thin layer of joint compound over the tape, using a taping knife to smooth it out. Allow the compound to dry completely before proceeding to the next step. Following these steps carefully will ensure a solid foundation for the rest of your repair process.
Techniques for Taping and Mudding
Taping and mudding are essential steps in achieving a smooth, seamless repair on your Sheetrock ceiling. Begin by applying drywall tape over the seams where the new Sheetrock meets the existing ceiling. You can use either paper tape or mesh tape, depending on your preference. Paper tape is stronger but requires a thin layer of joint compound underneath to adhere, while mesh tape has a self-adhesive backing and is easier to apply.
Once the tape is in place, it's time to apply the first coat of joint compound, also known as mud. Use a 4-6 inch taping knife to spread a thin layer of compound over the tape, pressing firmly to ensure it adheres well and fills any gaps. The goal is to create a smooth surface that transitions seamlessly between the new and existing drywall. Allow the first coat to dry completely, which can take several hours or overnight, depending on the compound used.
After the first coat is dry, lightly sand the area to remove any high spots or rough edges. Then, apply a second coat of joint compound, this time using a wider taping knife, around 8-10 inches. Feather the edges of the compound to blend it into the surrounding ceiling. Again, allow this coat to dry thoroughly before sanding. Depending on the extent of the repair, you may need to apply a third coat, using a 12-inch knife for a final, smooth finish. Patience and attention to detail during the taping and mudding process will result in a professional-looking repair.
Sanding and Finishing Your Repair
Sanding is a critical step in achieving a flawless finish on your Sheetrock ceiling repair. Once the final coat of joint compound is completely dry, use fine-grit sandpaper or a sanding block to smooth out the surface. Sand in a circular motion, blending the edges of the compound into the existing ceiling. Be careful not to sand too aggressively, as this can create uneven spots or expose the tape underneath. A light touch is often all that's needed to achieve a smooth finish.
After sanding, wipe down the area with a damp cloth to remove any dust. This step is essential to ensure proper adhesion of any primer or paint you apply next. Inspect the surface closely for any imperfections. If you notice any small dents or rough spots, apply a thin layer of joint compound to those areas, let it dry, and sand again. Achieving a smooth, even surface is crucial for a professional-looking repair.
Once you're satisfied with the sanding, it's time to apply a primer. Choose a high-quality primer designed for drywall to create a uniform base for your paint. Apply the primer with a roller, using even strokes to cover the entire repaired area. Allow the primer to dry completely before proceeding to the next step. Proper sanding and finishing will ensure that your repair blends seamlessly with the rest of your ceiling, making it virtually indistinguishable from the original surface.
Painting and Matching the Ceiling Texture
Painting and matching the ceiling texture are the final steps in your Sheetrock ceiling repair project. Start by selecting a paint that matches the color of your existing ceiling. If you're unsure of the exact shade, take a small sample of the old paint to a paint store for a match. Apply the paint with a roller, using even, overlapping strokes to ensure full coverage. Depending on the color and type of paint, you may need to apply a second coat for a uniform finish.
If your ceiling has a textured finish, you'll need to replicate this texture to achieve a seamless repair. There are several common ceiling textures, such as popcorn, knockdown, and orange peel. Each texture requires a different technique and tools. For example, a popcorn texture can be recreated using a texture sprayer and a special popcorn ceiling mix. Knockdown texture involves applying a thin layer of joint compound with a trowel, then lightly knocking down the peaks with a drywall knife. Orange peel texture can be achieved using a spray texture hopper and adjusting the air pressure to create the desired effect.
Practice your texturing technique on a scrap piece of drywall or cardboard before applying it to the ceiling. This will give you a chance to fine-tune your method and ensure a better match. Once you're confident in your technique, apply the texture to the repaired area, blending it into the surrounding ceiling. Allow the texture to dry completely before applying the final coat of paint. Matching the texture and paint will ensure that your repair is virtually invisible, restoring the beauty and uniformity of your ceiling.
Maintenance Tips to Prevent Future Damage
Preventing future damage to your Sheetrock ceiling involves regular maintenance and prompt attention to potential issues. One of the most effective ways to prevent water damage is to address any leaks or moisture problems immediately. Regularly inspect your roof, plumbing, and HVAC systems for signs of leaks or condensation. Ensure that your home is properly ventilated to reduce humidity levels, which can contribute to moisture buildup and mold growth.
Another important aspect of ceiling maintenance is to avoid excessive weight and impact on the ceiling. Be mindful when moving furniture or installing fixtures to prevent accidental damage. If you have an attic above your Sheetrock ceiling, avoid overloading it with heavy items that could cause the ceiling to sag or crack. Installing insulation can also help protect your ceiling by regulating temperature and reducing moisture.
Regularly inspect your ceiling for signs of wear and tear, such as cracks, stains, or sagging. Addressing minor issues promptly can prevent them from developing into more significant problems. For example, small cracks can be filled with joint compound and sanded smooth before they expand. If you notice any signs of structural movement or settling, consult a professional to assess and address the underlying cause. By staying vigilant and proactive, you can maintain the integrity and appearance of your Sheetrock ceiling, reducing the need for future repairs.
Home | Contact | Offices | Faq | Service Area | Blog | Drywall Finishing | Drywall Taping | Drywall Repair | Plaster Repair | Ceiling Repair | Wall Repair | Drywall Installation | Drywall Hanging | Popcorn Ceiling Repair | Hole in Ceiling | Fix Hole In The Wall | Interior Painting | Knockdown Texture | Water Damage Repair | Drywall Bathroom | Drywall Ceiling | Soundboard | Drywall Patch | Ice Dam Roof Leak | Drywall over Plaster | Drywall Over Popcorn | Skim Coat Level 5 | Popcorn Texture Removal | Drywall Finish Levels | | Refund Policy | Privacy Policy | Terms and Conditions


600 East Main St Chicopee, MA, 01020
203 Circuit Ave n39, West Springfield, MA 01089

